
DIY home projects
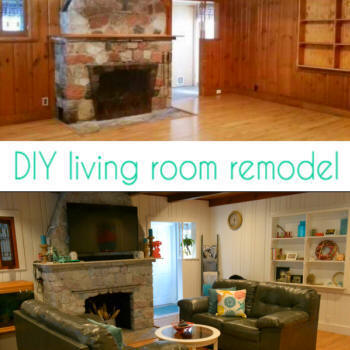
Before and after living room pictures
* This post may contain affiliate links.
This house....it started as a love-hate relationship. I loved the layout, the size, where it was located, etc, etc - but I hated what it was like inside. Besides being filthy, it was....well....the people that lived in it before us had a much different taste than we did. We knew that by the time the house was fixed to our liking, we would eventually love it again.
One of the projects in this house was the living room. The previous owners had it looking like a dark and dirty wood cabin. Seriously. It was dark and dirty was an understatement. There was wood everywhere in the living room and entry way making it seem like some sort of dungeon. However, once you went to most of the other rooms, it was much more cheery with white trim and lighter colored walls. So nothing seemed to blend together. Being near Lake Michigan, we wanted to go with a bright, cheery cottage look instead of a cabin in the woods look.
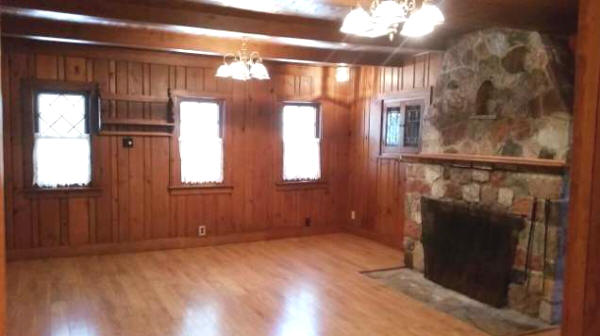
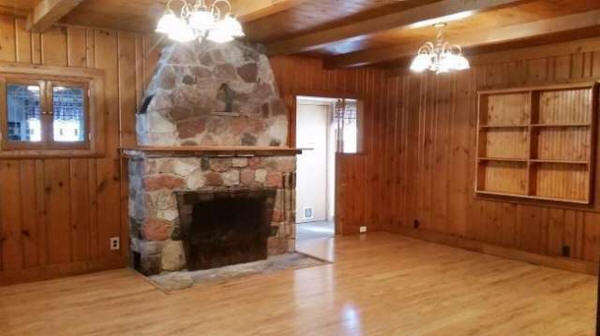
We knew we needed to tackle the wood paneling, but couldn't decide what to do. Take it off? Re-drywall? Paint? Everyone had an idea, but it seemed each idea lead to another problem. This house was old. The wiring was old. There was also 2 chandeliers hanging in the middle of the living room you could hit your head on. Everything was needing to be updated or replaced.
We liked the look of the paneling - that it had some texture to it. We liked that it wasn't typical drywall, so that's when we decided we wanted to keep that look for the cottage feel and we settled on painting it. But we were so scared to paint it that we put it off for about 5 months.
But we did it! Am I glad we did it!
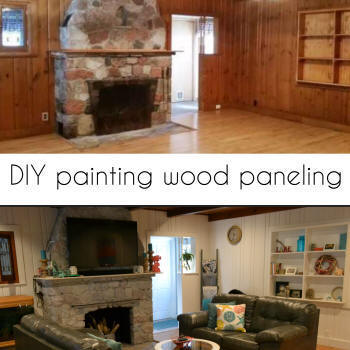
You can get the complete DIY for painting the wood paneling here. We had to first apply a coat of primer. After some trial and error we ended up using the this primer
I highly recommend these brushes
You can also find out how we whitewashed our fireplace to make it blend in more with the decor. You can find that DIY here!

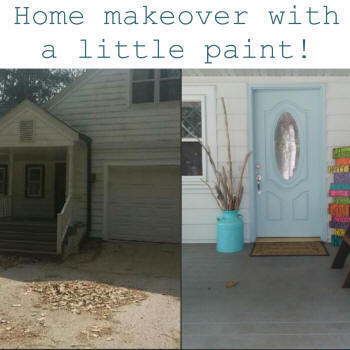
We also painted our front entry way which is right off the living room. It was solid wood paneling as well, so it really brightened up the front entrance. We also gave the front door a new coat of paint. It had previously been a dark maroon color and we painted it Behr Malaysian Mist. I love the front door color, especially from the front porch.
We put in new recessed lighting, added a ceiling fan, put in new wiring and new outlets, added super cool window treatments to the windows, hung up new curtains, whitewashed the entire fireplace and a few other misc projects.
What a huge difference. Obviously the paint was the main project of this remodel, but whitewashing the fireplace also made a big difference in the feel of the room. Plus all the other little projects and all the DIY decor projects we did have completely transformed this creepy cabin into a cheery cottage.
do it yourself/h2>
Want more DIY's?
&
CrazyDIYmom.com Contact Us Privacy Policy Disclaimer About me