
DIY home projects
This post may contain affiliate links.
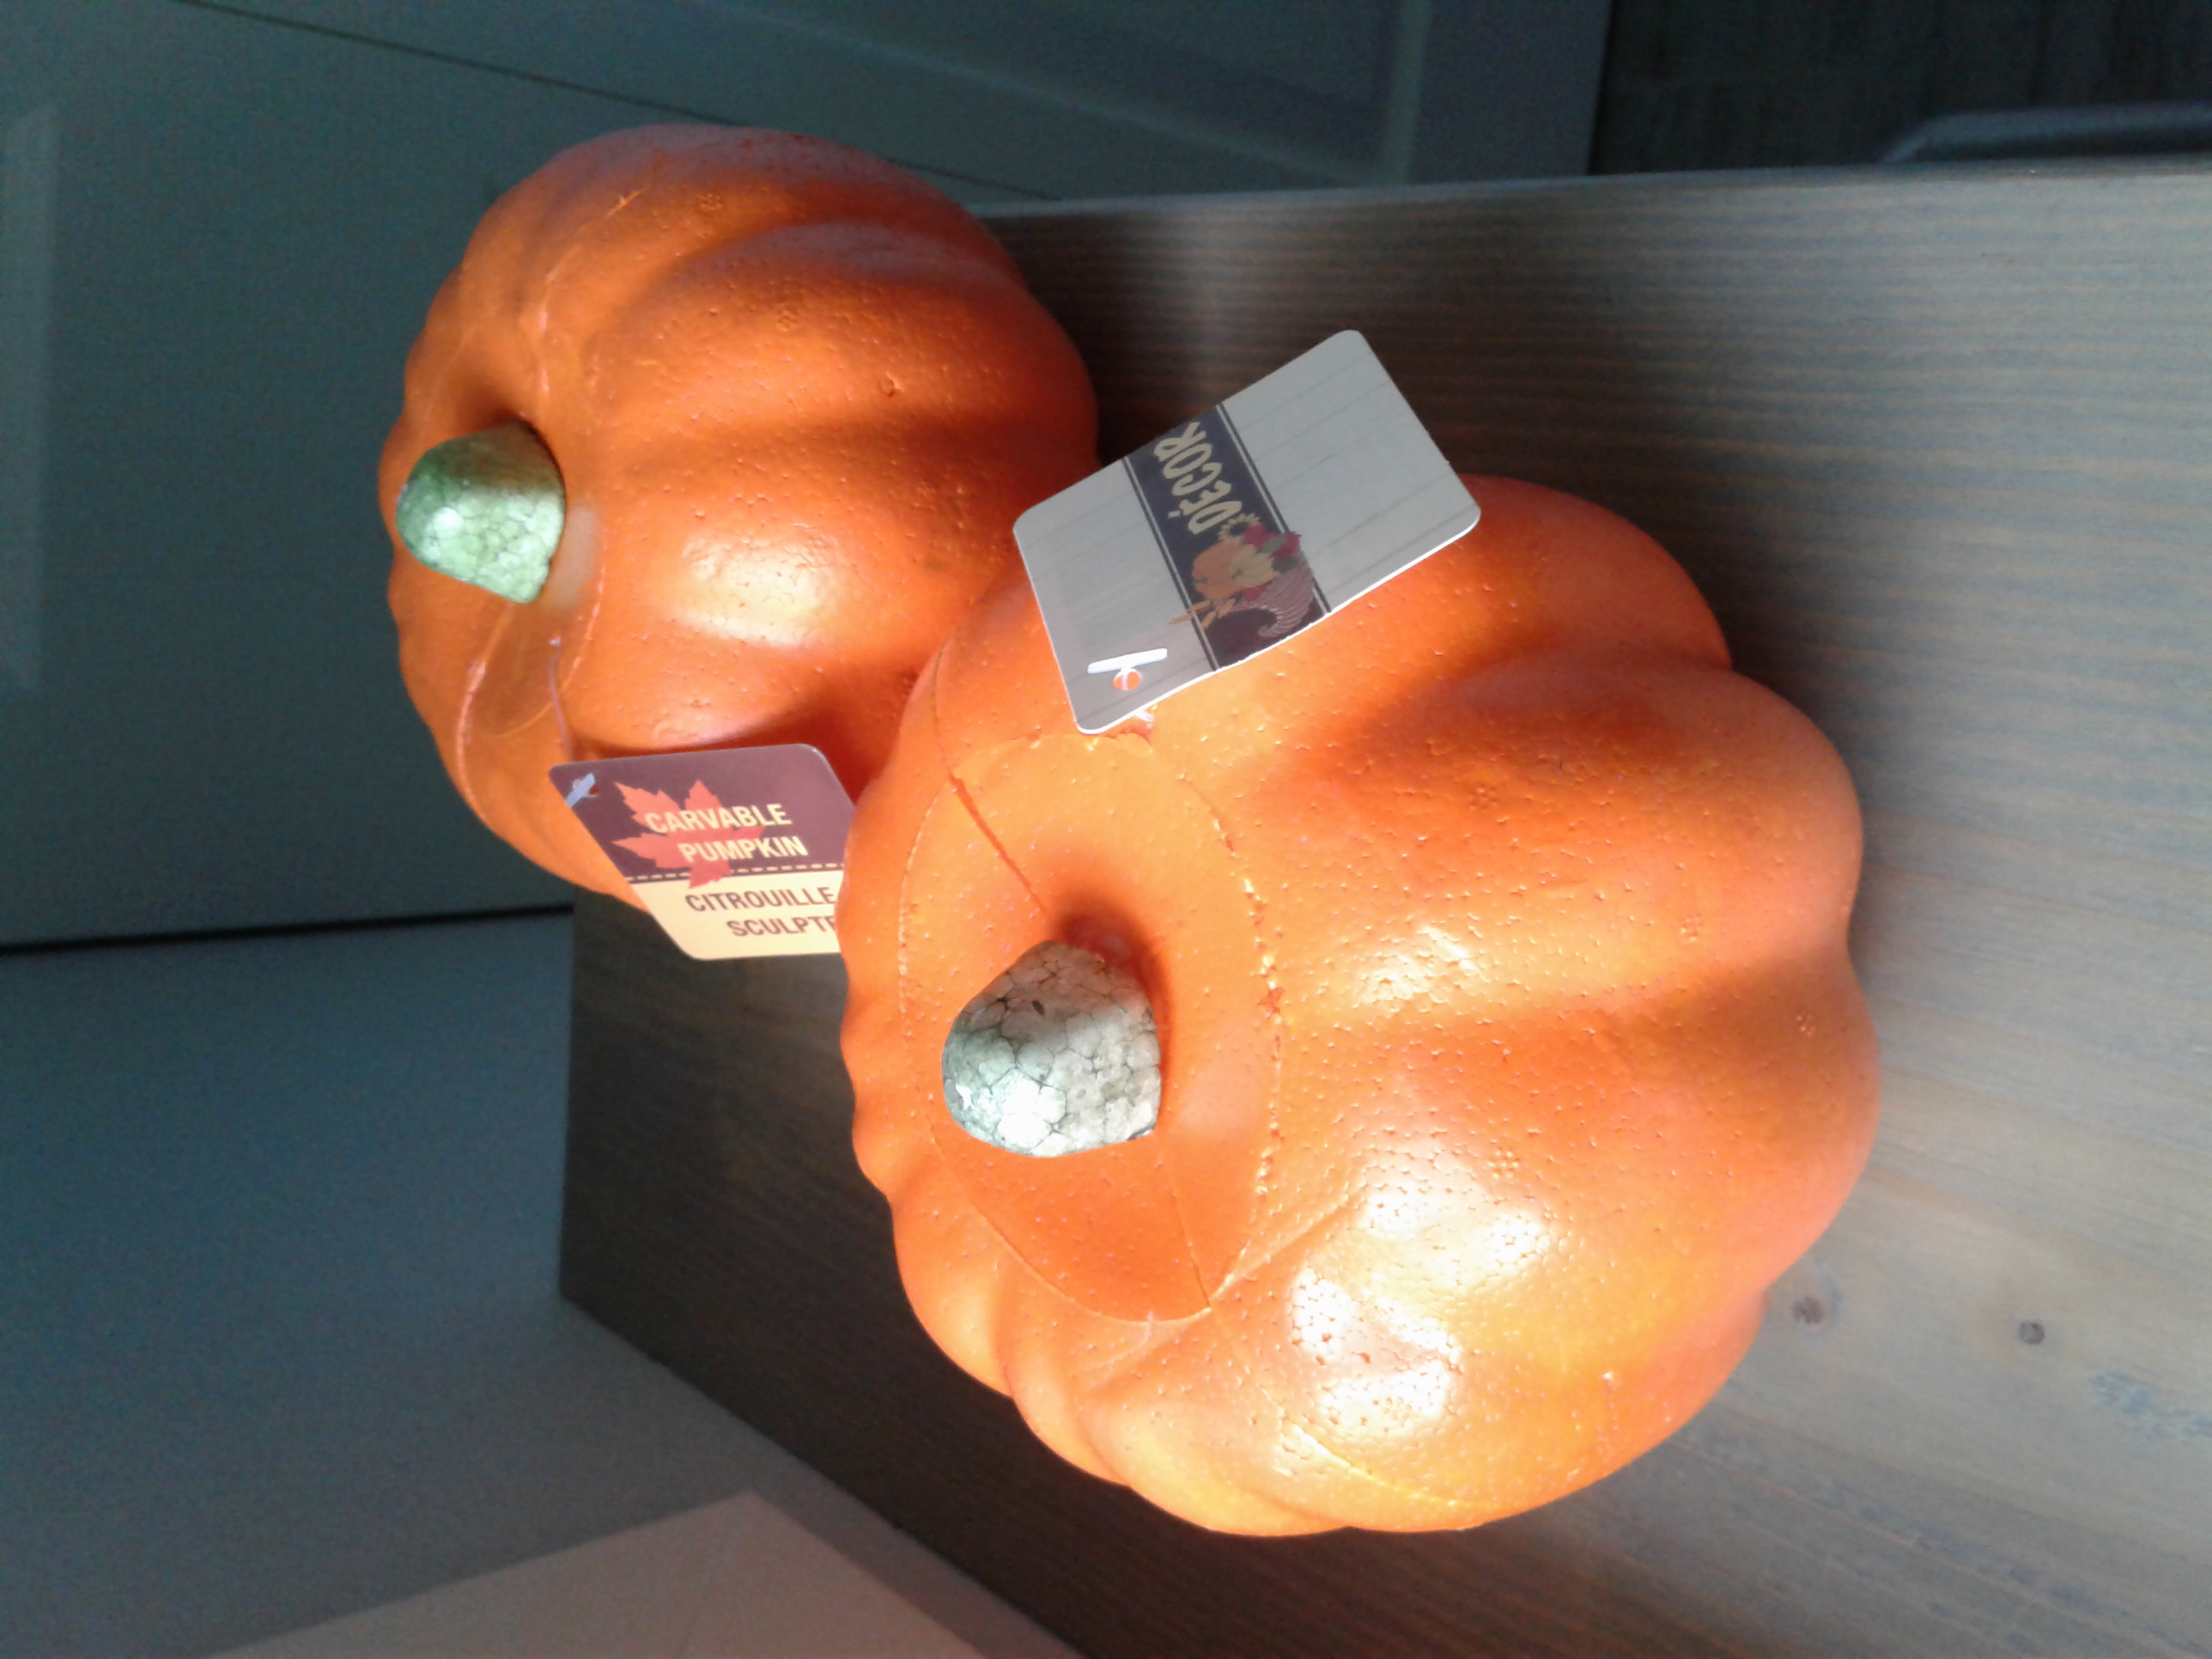
You've probably seen those cheap, foam pumpkins at the dollar store before. And they look very cheap. And the orange color on them, is, um...bright.
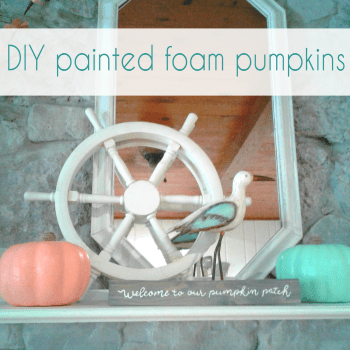
I have OCD when it comes to my decor matching, so there was no way I could put these bright orange pumpkins up with my beachy decor, but I still wanted to decorate for Fall and Thanksgiving.
So I grabbed out my paint and got to work!
What you'll need:
acrylic paint in your choice of colors
paint brush
hot glue gun
twine
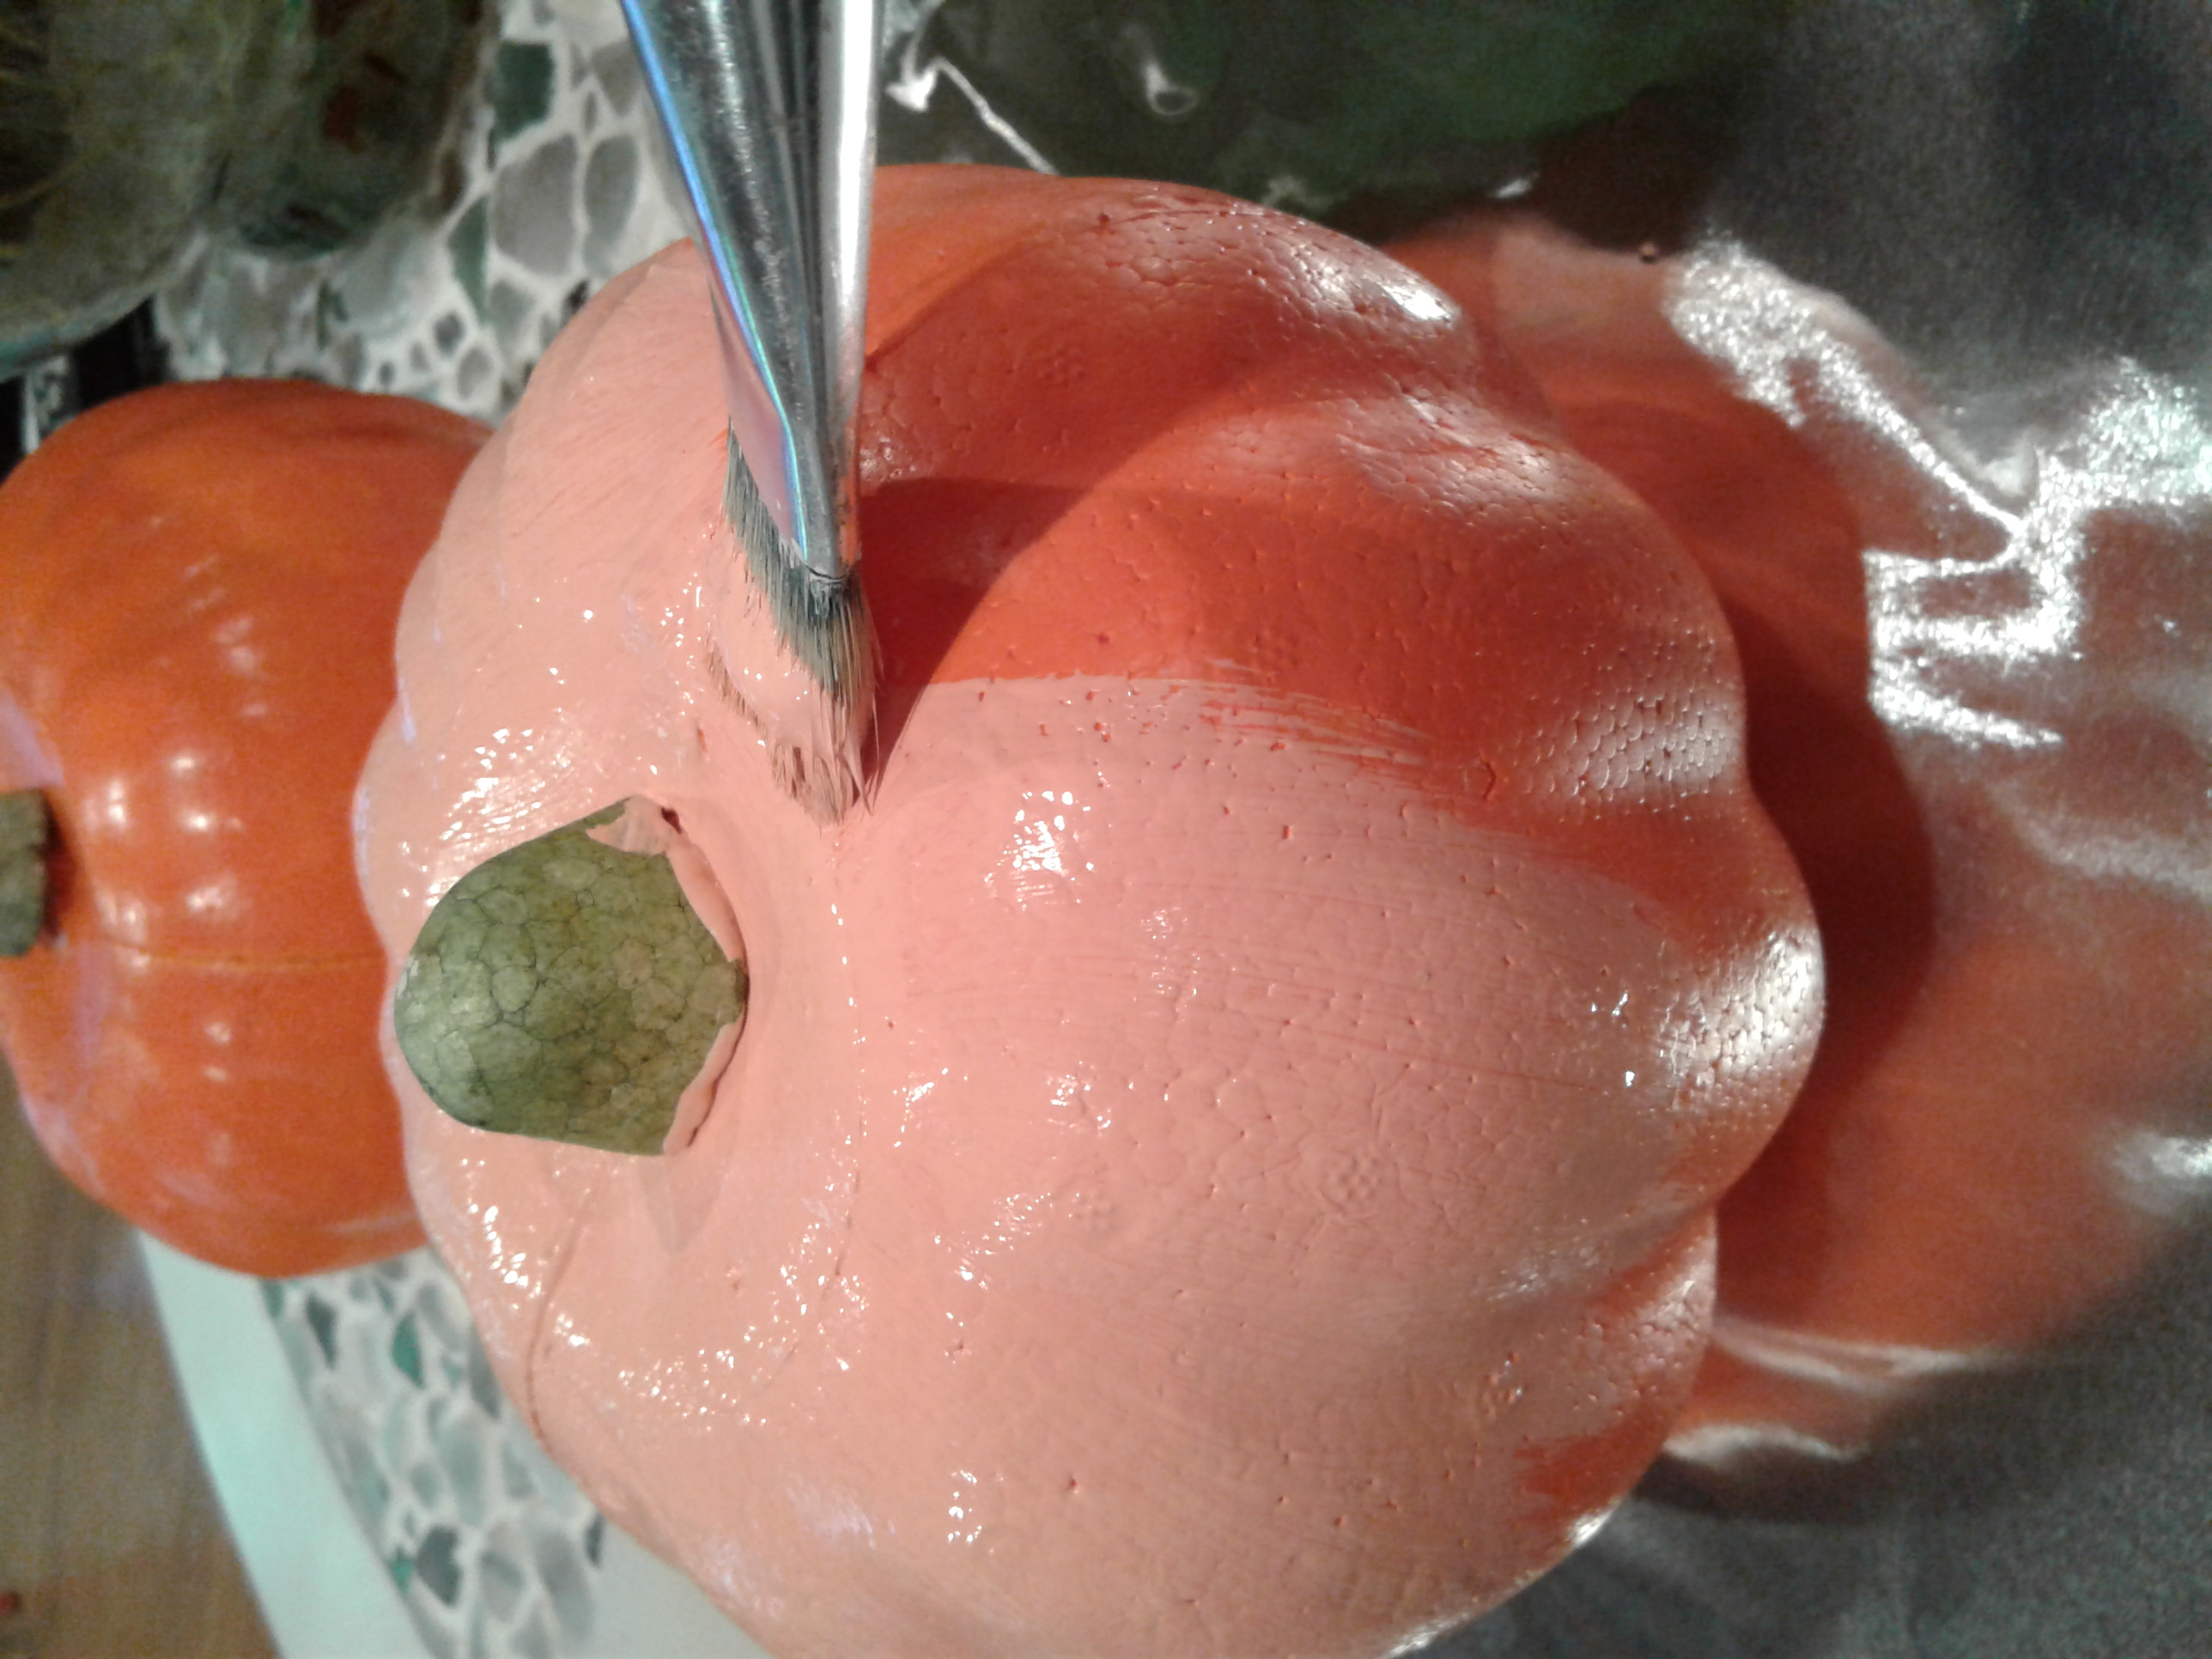
Ok, paint your pumpkin in your choice of color(s). I chose colors that matched with my beachy decor colors, but you can use any color of acrylic paint you would like.
You will probably need 2-3 coats of paint on your pumpkin to cover it good. Make sure you let each coat dry good before adding another one to prevent the paint from sticking back to your brush and wiping off.
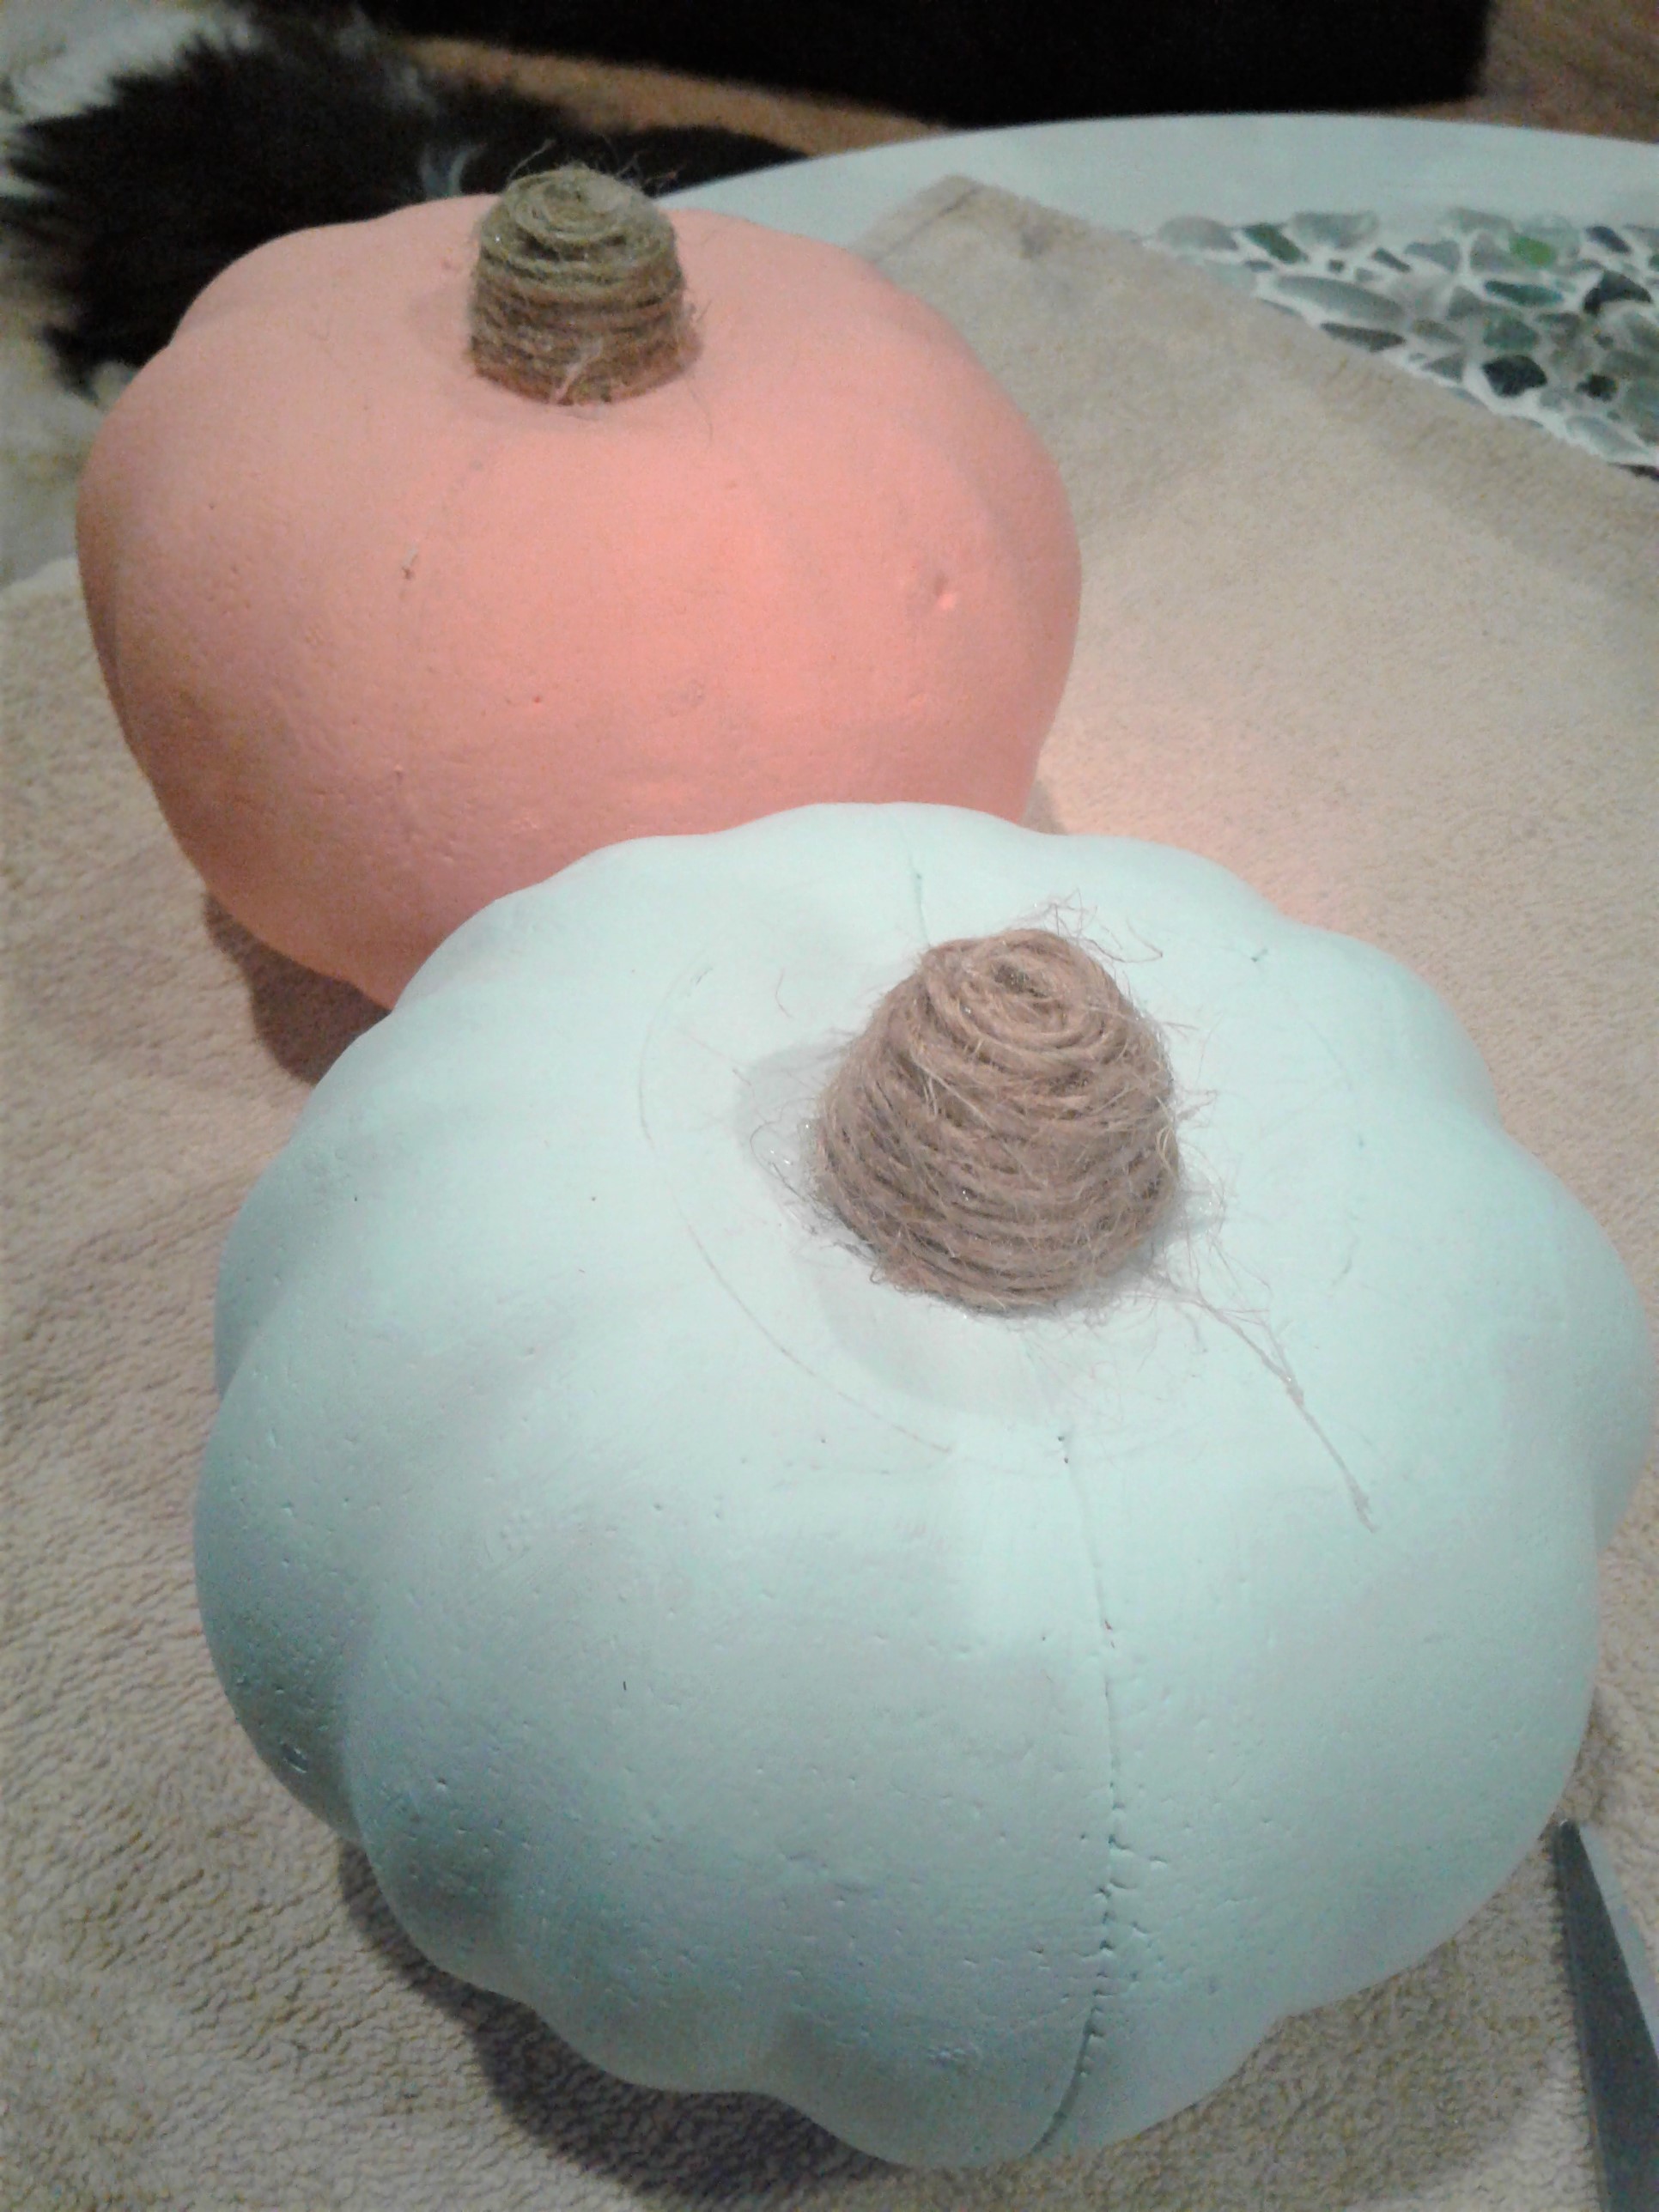
Once your paint is completely dry, it's time to add a little twine around the stem to cover up that ugly green color ;)
Start at the base of the stem and add a little hot glue and stick your twine into it. Then continue adding glue and wrapping your twine around the stem until you have it all covered.
Then you are ready to display your new and prettier pumpkins!
Can't find these items at your local dollar store? Get them online at DollarTree.com
do it yourself
Want more DIY's?CrazyDIYmom.com Contact Us Privacy Policy Disclaimer About me