
DIY home projects
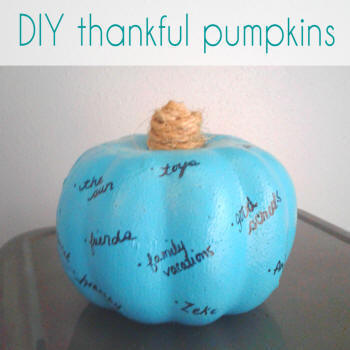
DIY thankful pumpkins
* This post may contain affiliate links
What a sweet new tradition to start with your family!
My thankful pumpkins are a great way to share with your family what you are thankful for each year. You can save ones from previous years and decorate with them each year and reminisce about the year and all of your blessings.
What you will need:
foam pumpkins
spray paint in your choice of color
sisal twine
a glue gun and glue
permanent markers
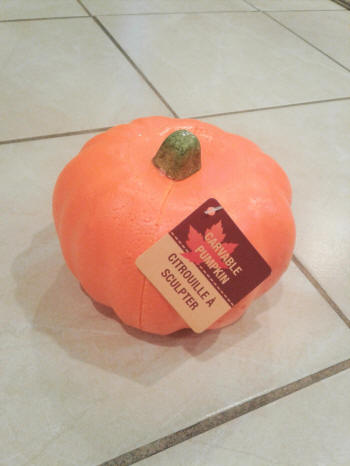
Start by spray painting your foam pumpkins
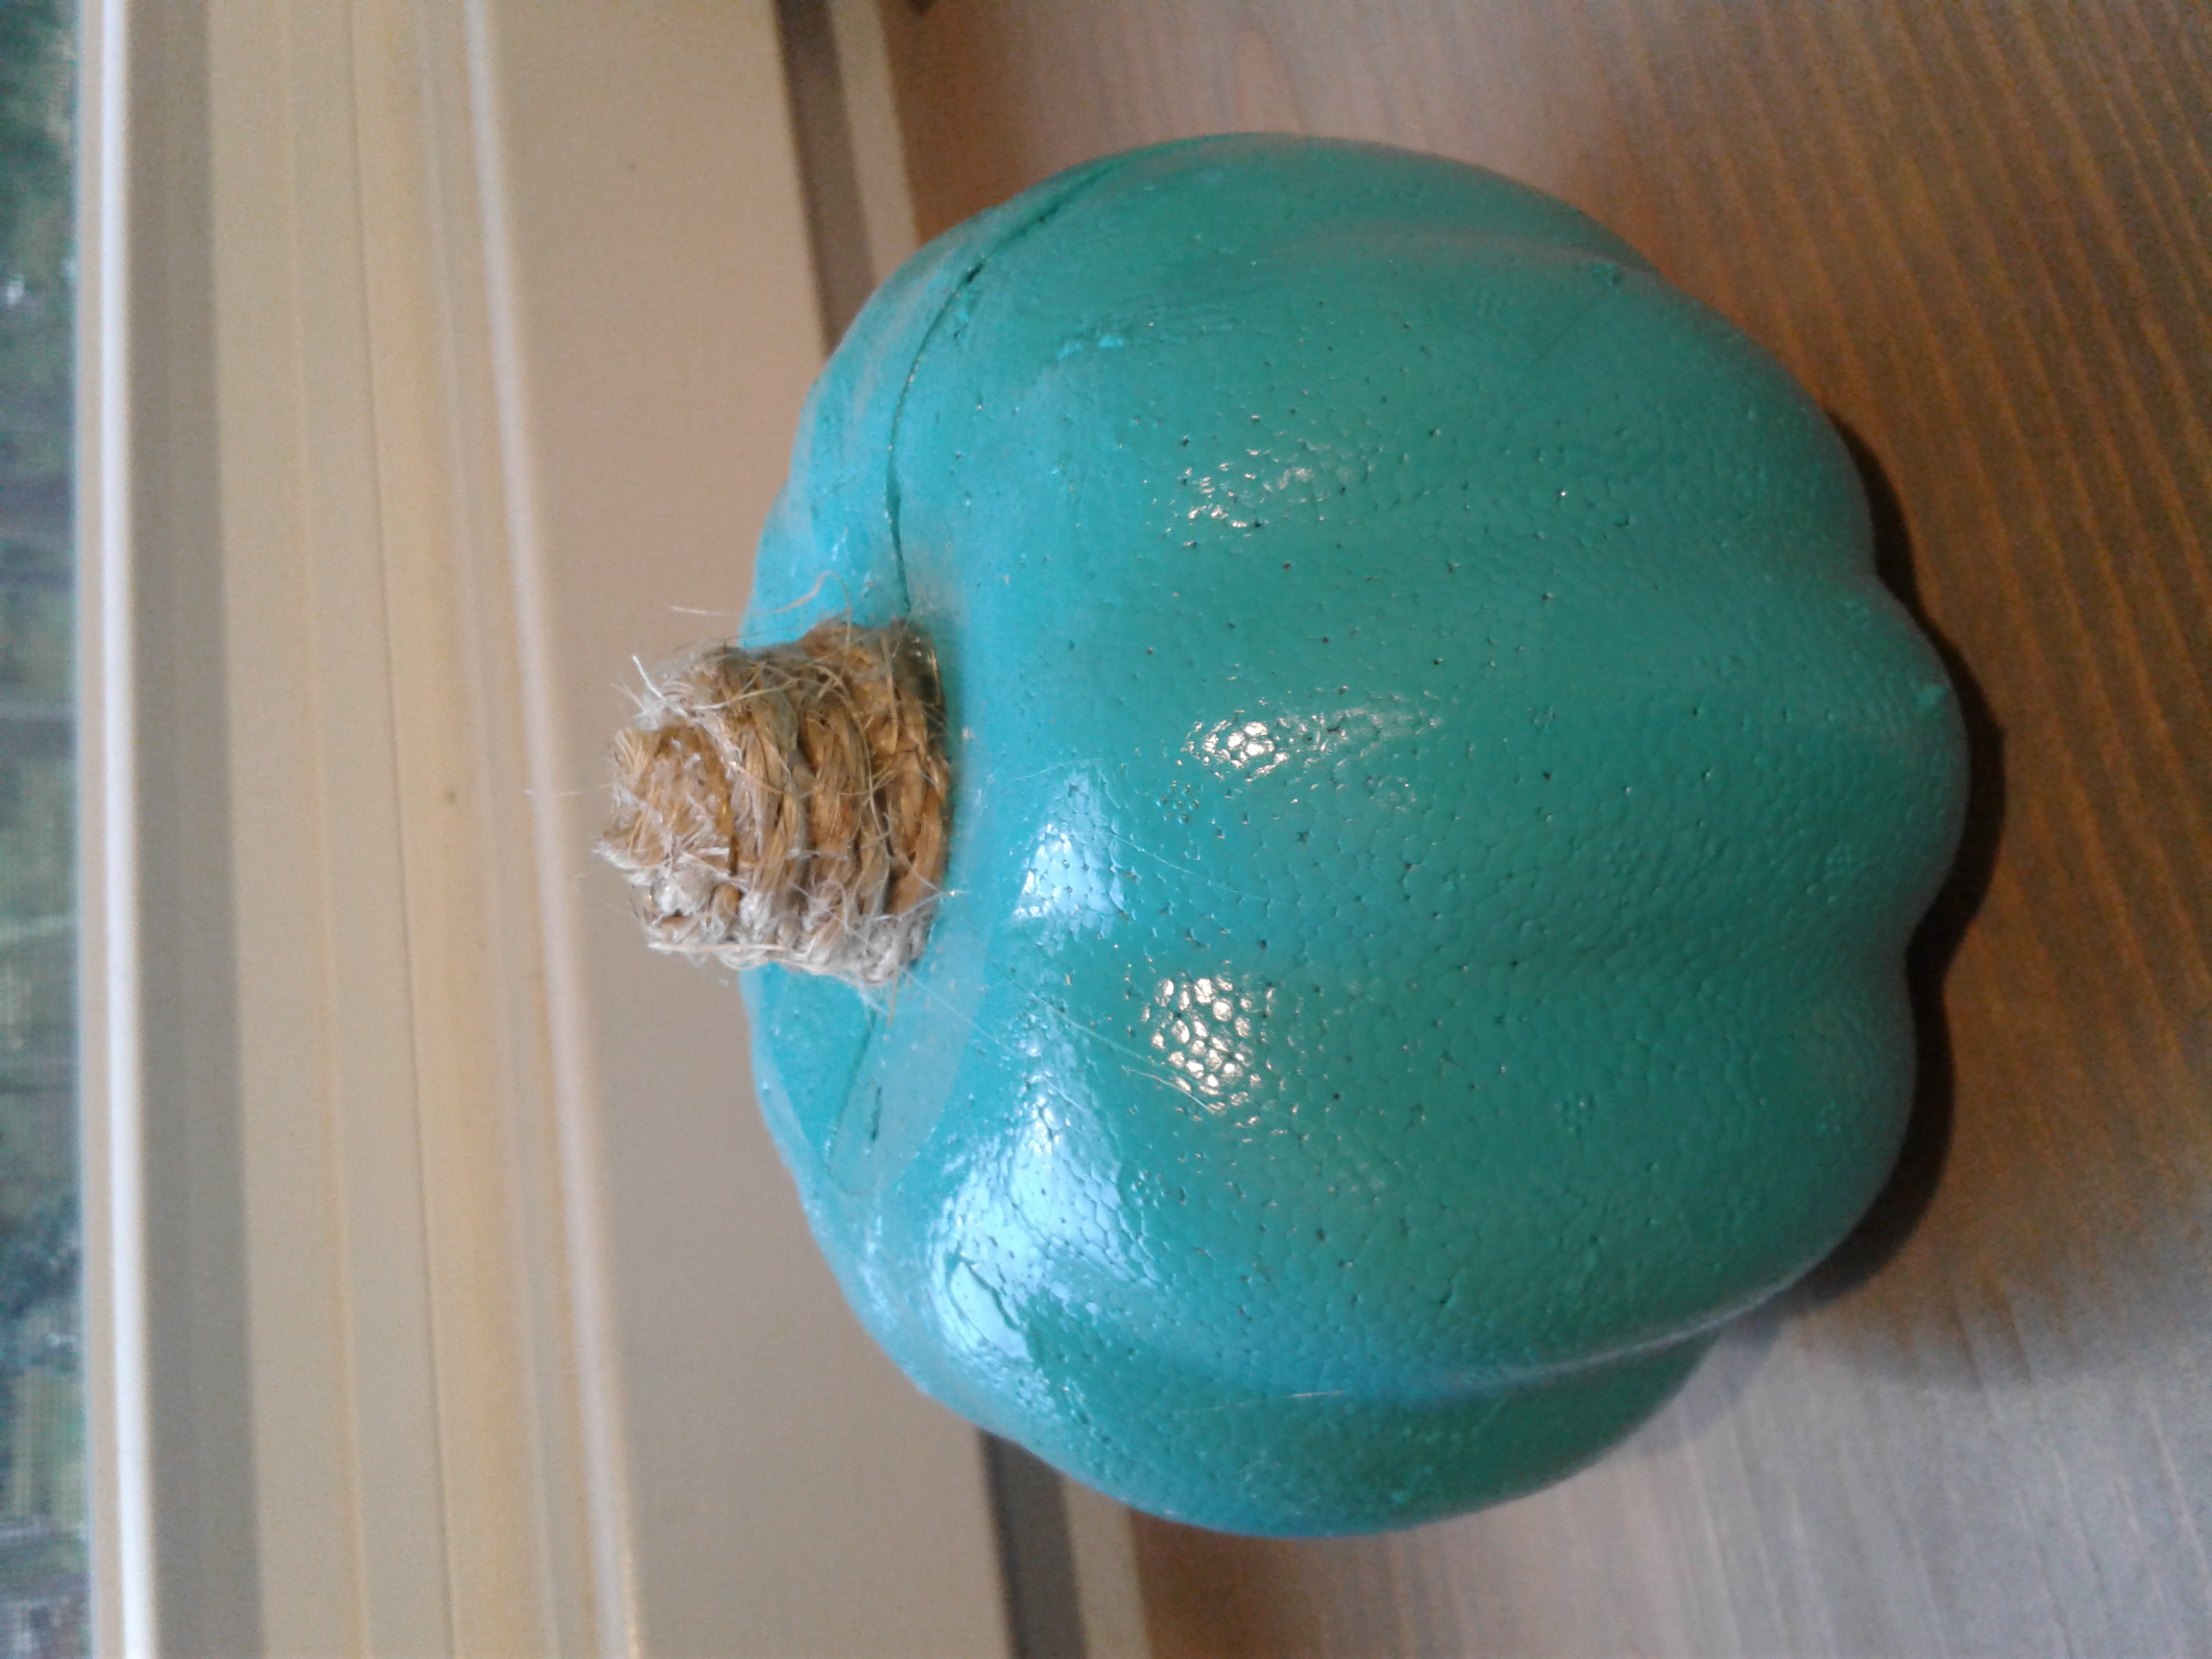
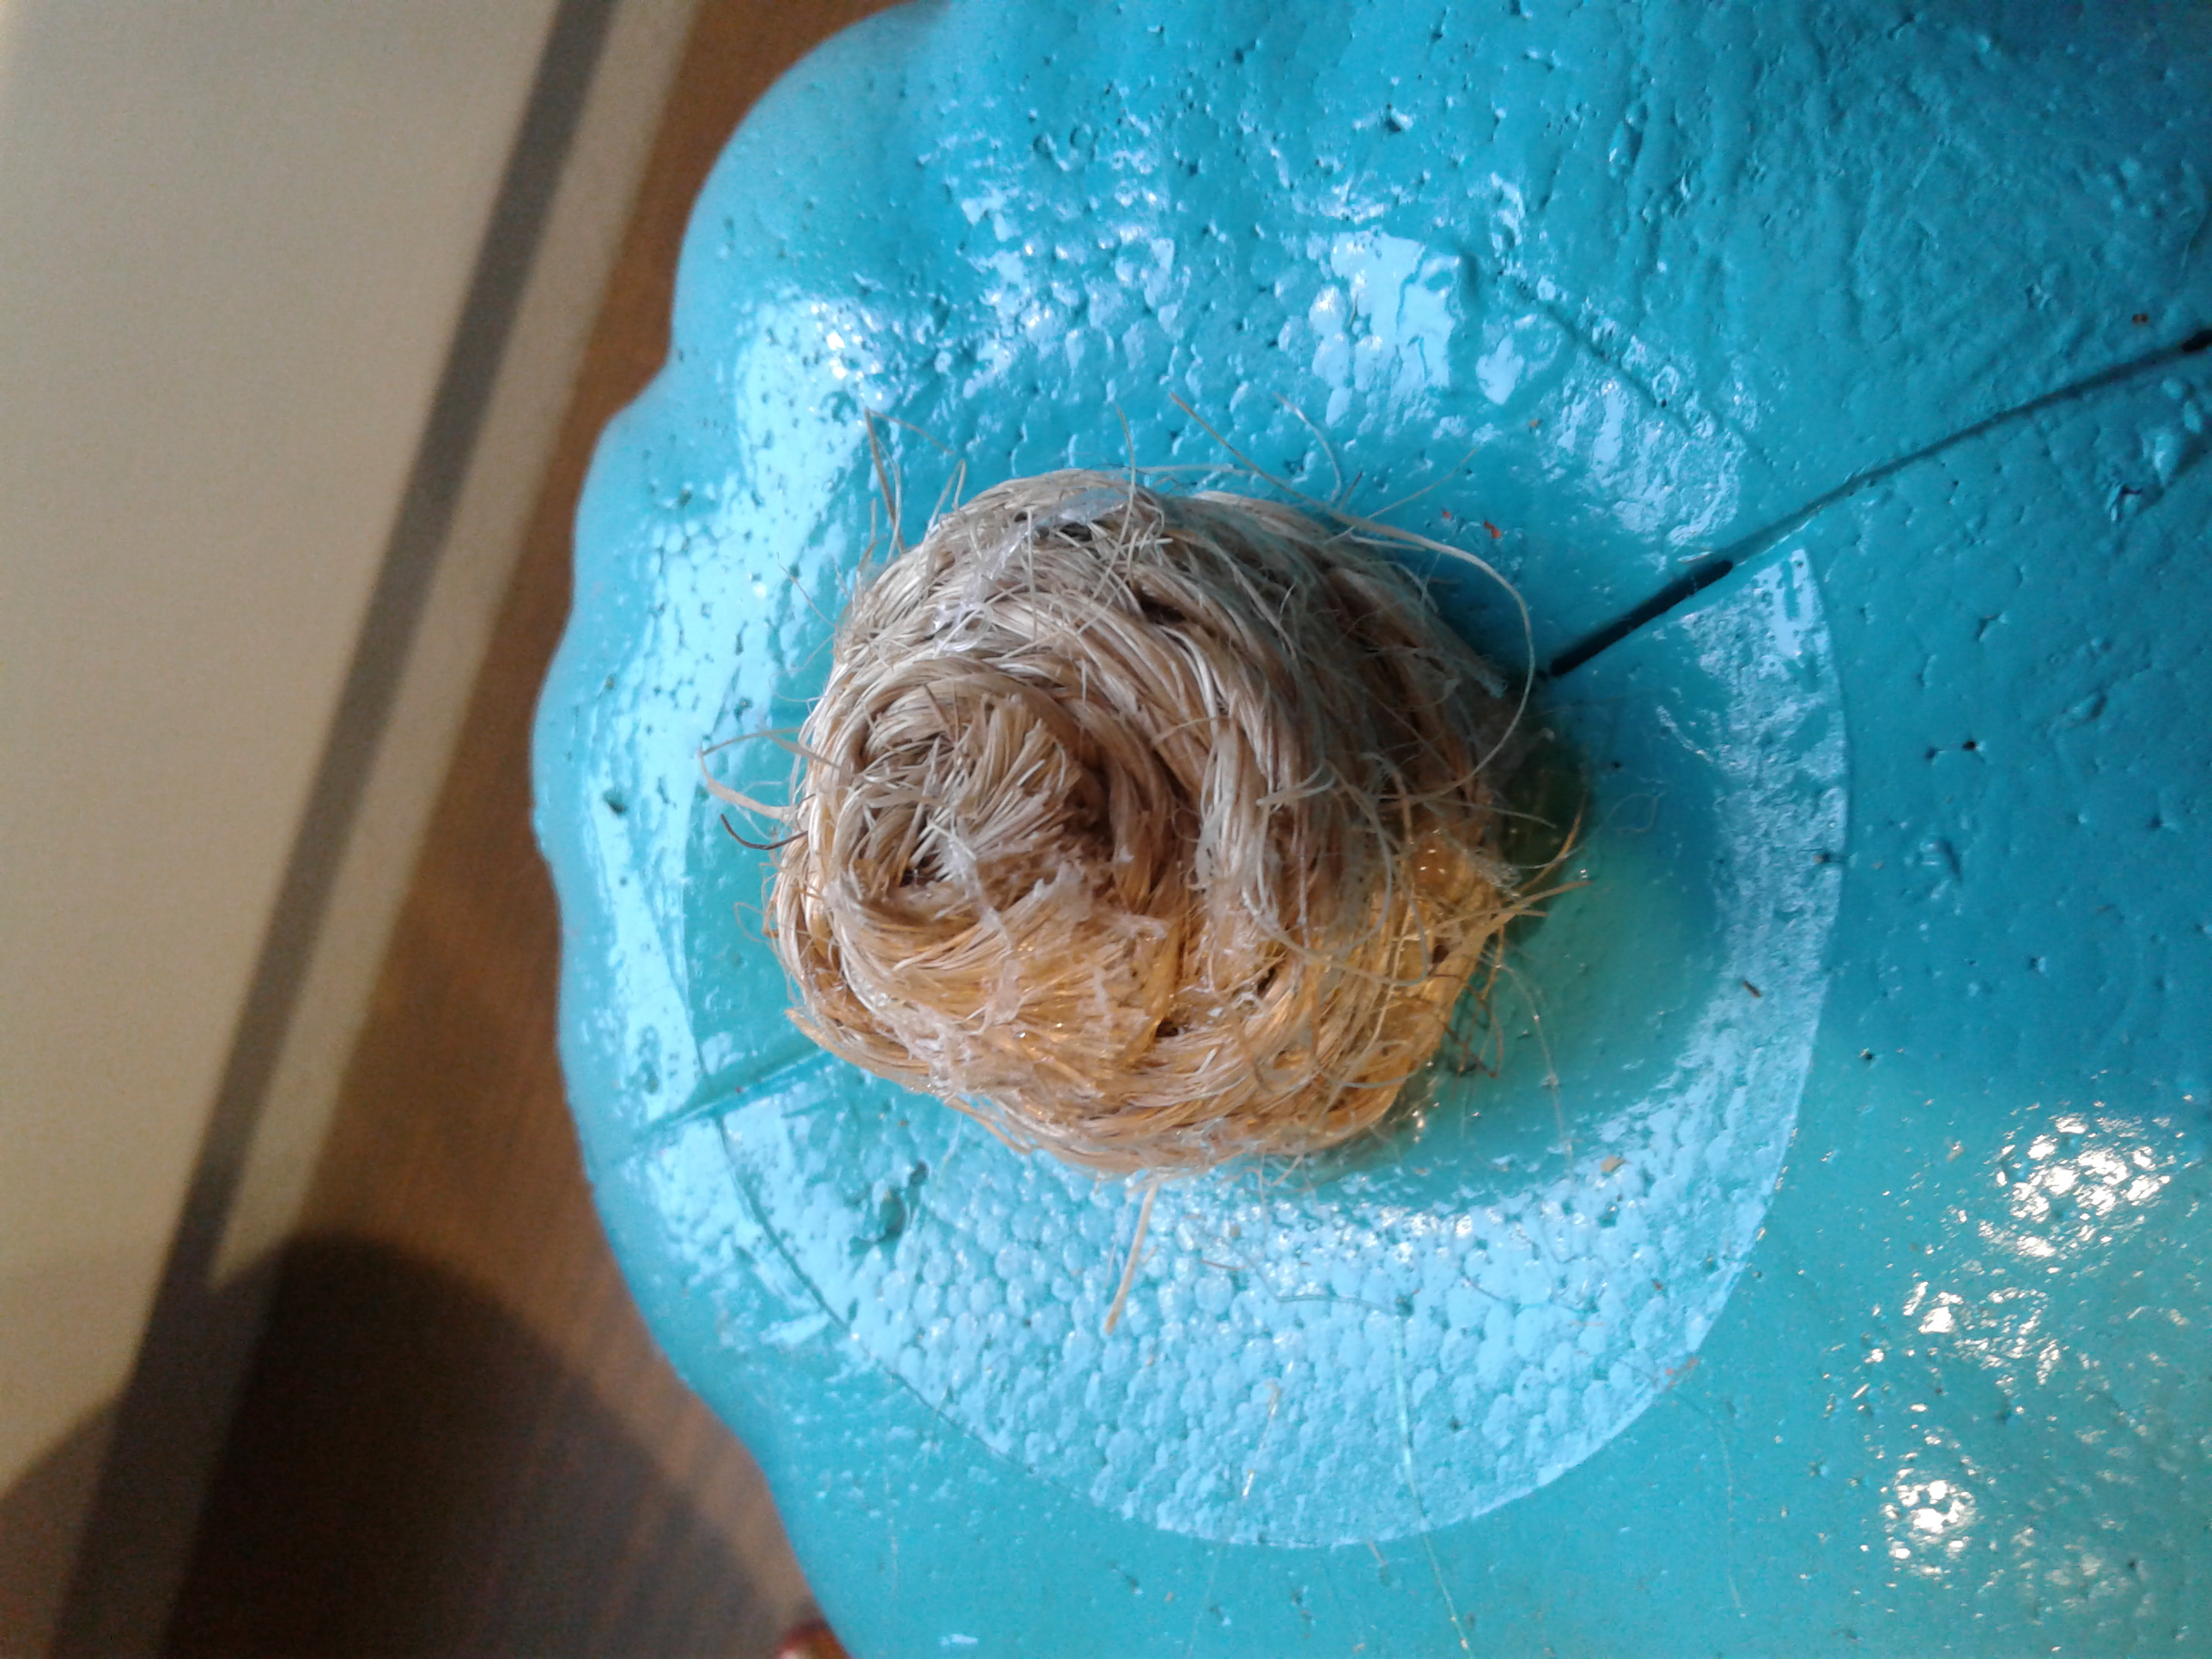
When your pumpkin is dry, use some hot glue to attach your sisal twine
Then you are ready to start writing down all of your blessings on your pumpkins! You can use an assortment of permanent markers
This would also be a fun activity to do at your extended family thanksgiving get together and then bring the pumpkins out each year to decorate with and be reminded of everything you have been blessed with through the years.
Can't find these items at your local dollar store? Get them online at DollarTree.com
do it yo
CrazyDIYmom.com Contact Us Privacy Policy Disclaimer About me