
DIY side table
This post may contain affiliate links.
With the weird design of our home and the placement of our furniture, I had a little corner between a wall and the sofa that needed a little table. Nothing too bit, but I wanted something there that I could set a drink on and display something pretty. I looked everywhere for a small table that would fit, but nothing was quite right, so I decided to make one.
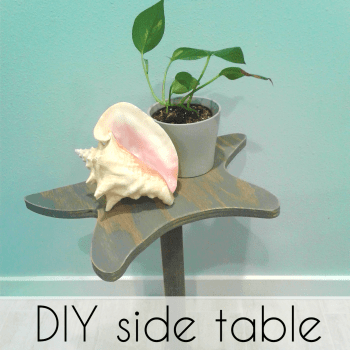
And since we have a beach theme to our decor, I decided to make a starfish shaped table. Yes, I know, it doesn't go with the Lake Michigan beach, but I love starfish and they were beachy, so I went for it.
What you'll need:
1" thick wood (I used some leftover pine boards I had from another project) X any size you want
2" square post, spindle, etc
jig saw
sandpaper
wood glue
construction screws
drill
drill bit and small dowel in matching sizes
Start by decided on the shape of your table. I wanted to do a starfish, so I printed off a basic starfish shape and used my projector to make it the size I wanted. Then I traced it onto some paper and then onto my wood. You can do this however you want and if your drawing skills are good, you could just draw out the shape onto the wood.

You will need a top for your table and a base as well, so make sure you cut out 2 shapes. I made my base piece smaller just to give it some more detail.

Take your jig saw and cut out your shapes. Once you have your shapes cut out, give them a good sanding with a sander or some sandpaper. You'll notice in the next few pictures that my wood is stained. I ended up not being able to find any construction screws, so since I had an extra day I decided to stain all my pieces so they would dry in time.
Now we are ready to attach the base of your table. Mark your screw holes with a pencil first, to make sure that both screws will attach inside your post. I used a small drill bit to predrill my screw holes in the right place and then attached both screws.

do it yourself
Next you are going to need to attach your table top to your square post. I didn't want to see screws on the top of my table so this is where you will need a drill bit and dowel in matching sizes. I had a 1/4" dowel at home so that is what I used. I took my 1/4" drill bit and predrilled a hole into the middle of the underside of my table top and into the middle of my post. Be sure when drilling into the table top not to go all the way through!
When you are ready to attach the top, add some wood glue to the top of the post and into your dowel holes to help hold it in place and be more secure.

Set your table aside for 24 hours to make sure your glue has plenty of time to dry. If you haven't yet, now you can either paint or stain your table.
I just love how it turned out! It looks perfect in the little corner of my living room.

Want more DIY's?
CrazyDIYmom.com Contact Us Privacy Policy Disclaimer About me