
DIY home projects
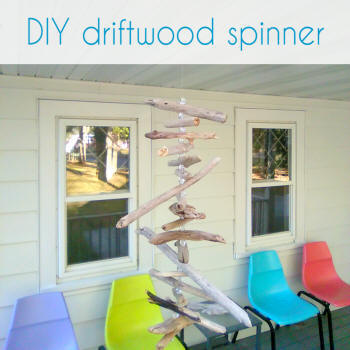
DIY driftwood spinner
* This post may contain affiliate links.
You will need:
a drill and small drill bit
scrap wood to drill into
pieces of driftwood
fishing line
2 screw eye hooks
beads are optional
Start by drilling a small hole in the middle and all the way through each piece of driftwood.
I like to then lay out my wood and sort of "design" it before I assemble it. This way if I have some pieces of wood that aren't straight I can angle them up or down around other pieces of wood.
Screw an eye hook into the top and bottom of the piece of driftwood that our spinner will hang from. Screw in the hooks directly above and below each other so that your spinner will be centered. One hook will be for hanging your spinner and one will be to hold all of the dangling pieces of driftwood.
Attach plenty of fishing line to the hook that will hold all of your driftwood pieces. Make sure the fishing line is long enough to hold all of your pieces as well. Figure in enough length for your knots and for the amount of space you want between the top two pieces of wood. Cut your fishing line yet a few inches longer than you expect it to be so you have more than enough line.
Now you are ready to attach your pieces. Your first piece will the top of the actual spinner so determine how much space you want between the piece of driftwood that holds it all and the top piece of the spinner.
Now start stacking on your driftwood. You could also add in beads, shells, rocks, etc in between each piece of driftwood.
Once you have everything assembled, tie your fishing line around the bottom piece of wood or bead so that it secures everything on the line. Tie two knots just to be safe.
Then hang it up and enjoy!

do it yourself
CrazyDIYmom.com Contact Us Privacy Policy Disclaimer About me