
DIY home projects
DIY concrete pumpkin
* This post may contain affiliate links.
Up here in Wisconsin we are well into fall weather. The leaves are starting to fall and the pumpkins are showing up on front porches. Here are our house, we can't successfully keep pumpkins on our porch. :( We have way too much wildlife that likes to munch on pumpkins. And they don't seem to mind coming right up to the front door if it means getting a nice meal.
So this year we had to brainstorm a way to decorate for fall, but not put out any real pumpkins.
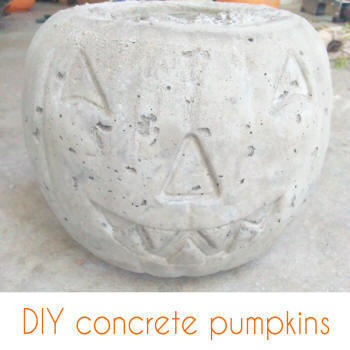
Ta Da! Concrete pumpkins!
And these little guys are so easy to make and the kids enjoyed doing them just as much as carving a real pumpkin. Plus, at a total cost of less then $10, it's cheaper than going to the pumpkin patch and if we want, we can reuse them every year.
What you need:
a bag of quickrete. You can use any kind. I grabbed the cheap bag - about $5
pumpkin pails - use these that have the "dents" in them for the face
cooking spray
an old cup if you want to make a hole on the inside of your pumpkin
Mix up your bag of concrete according to the directions on the bag. I ended up mixing up my entire 80lb bag and that made about 3 1/2 pumpkins
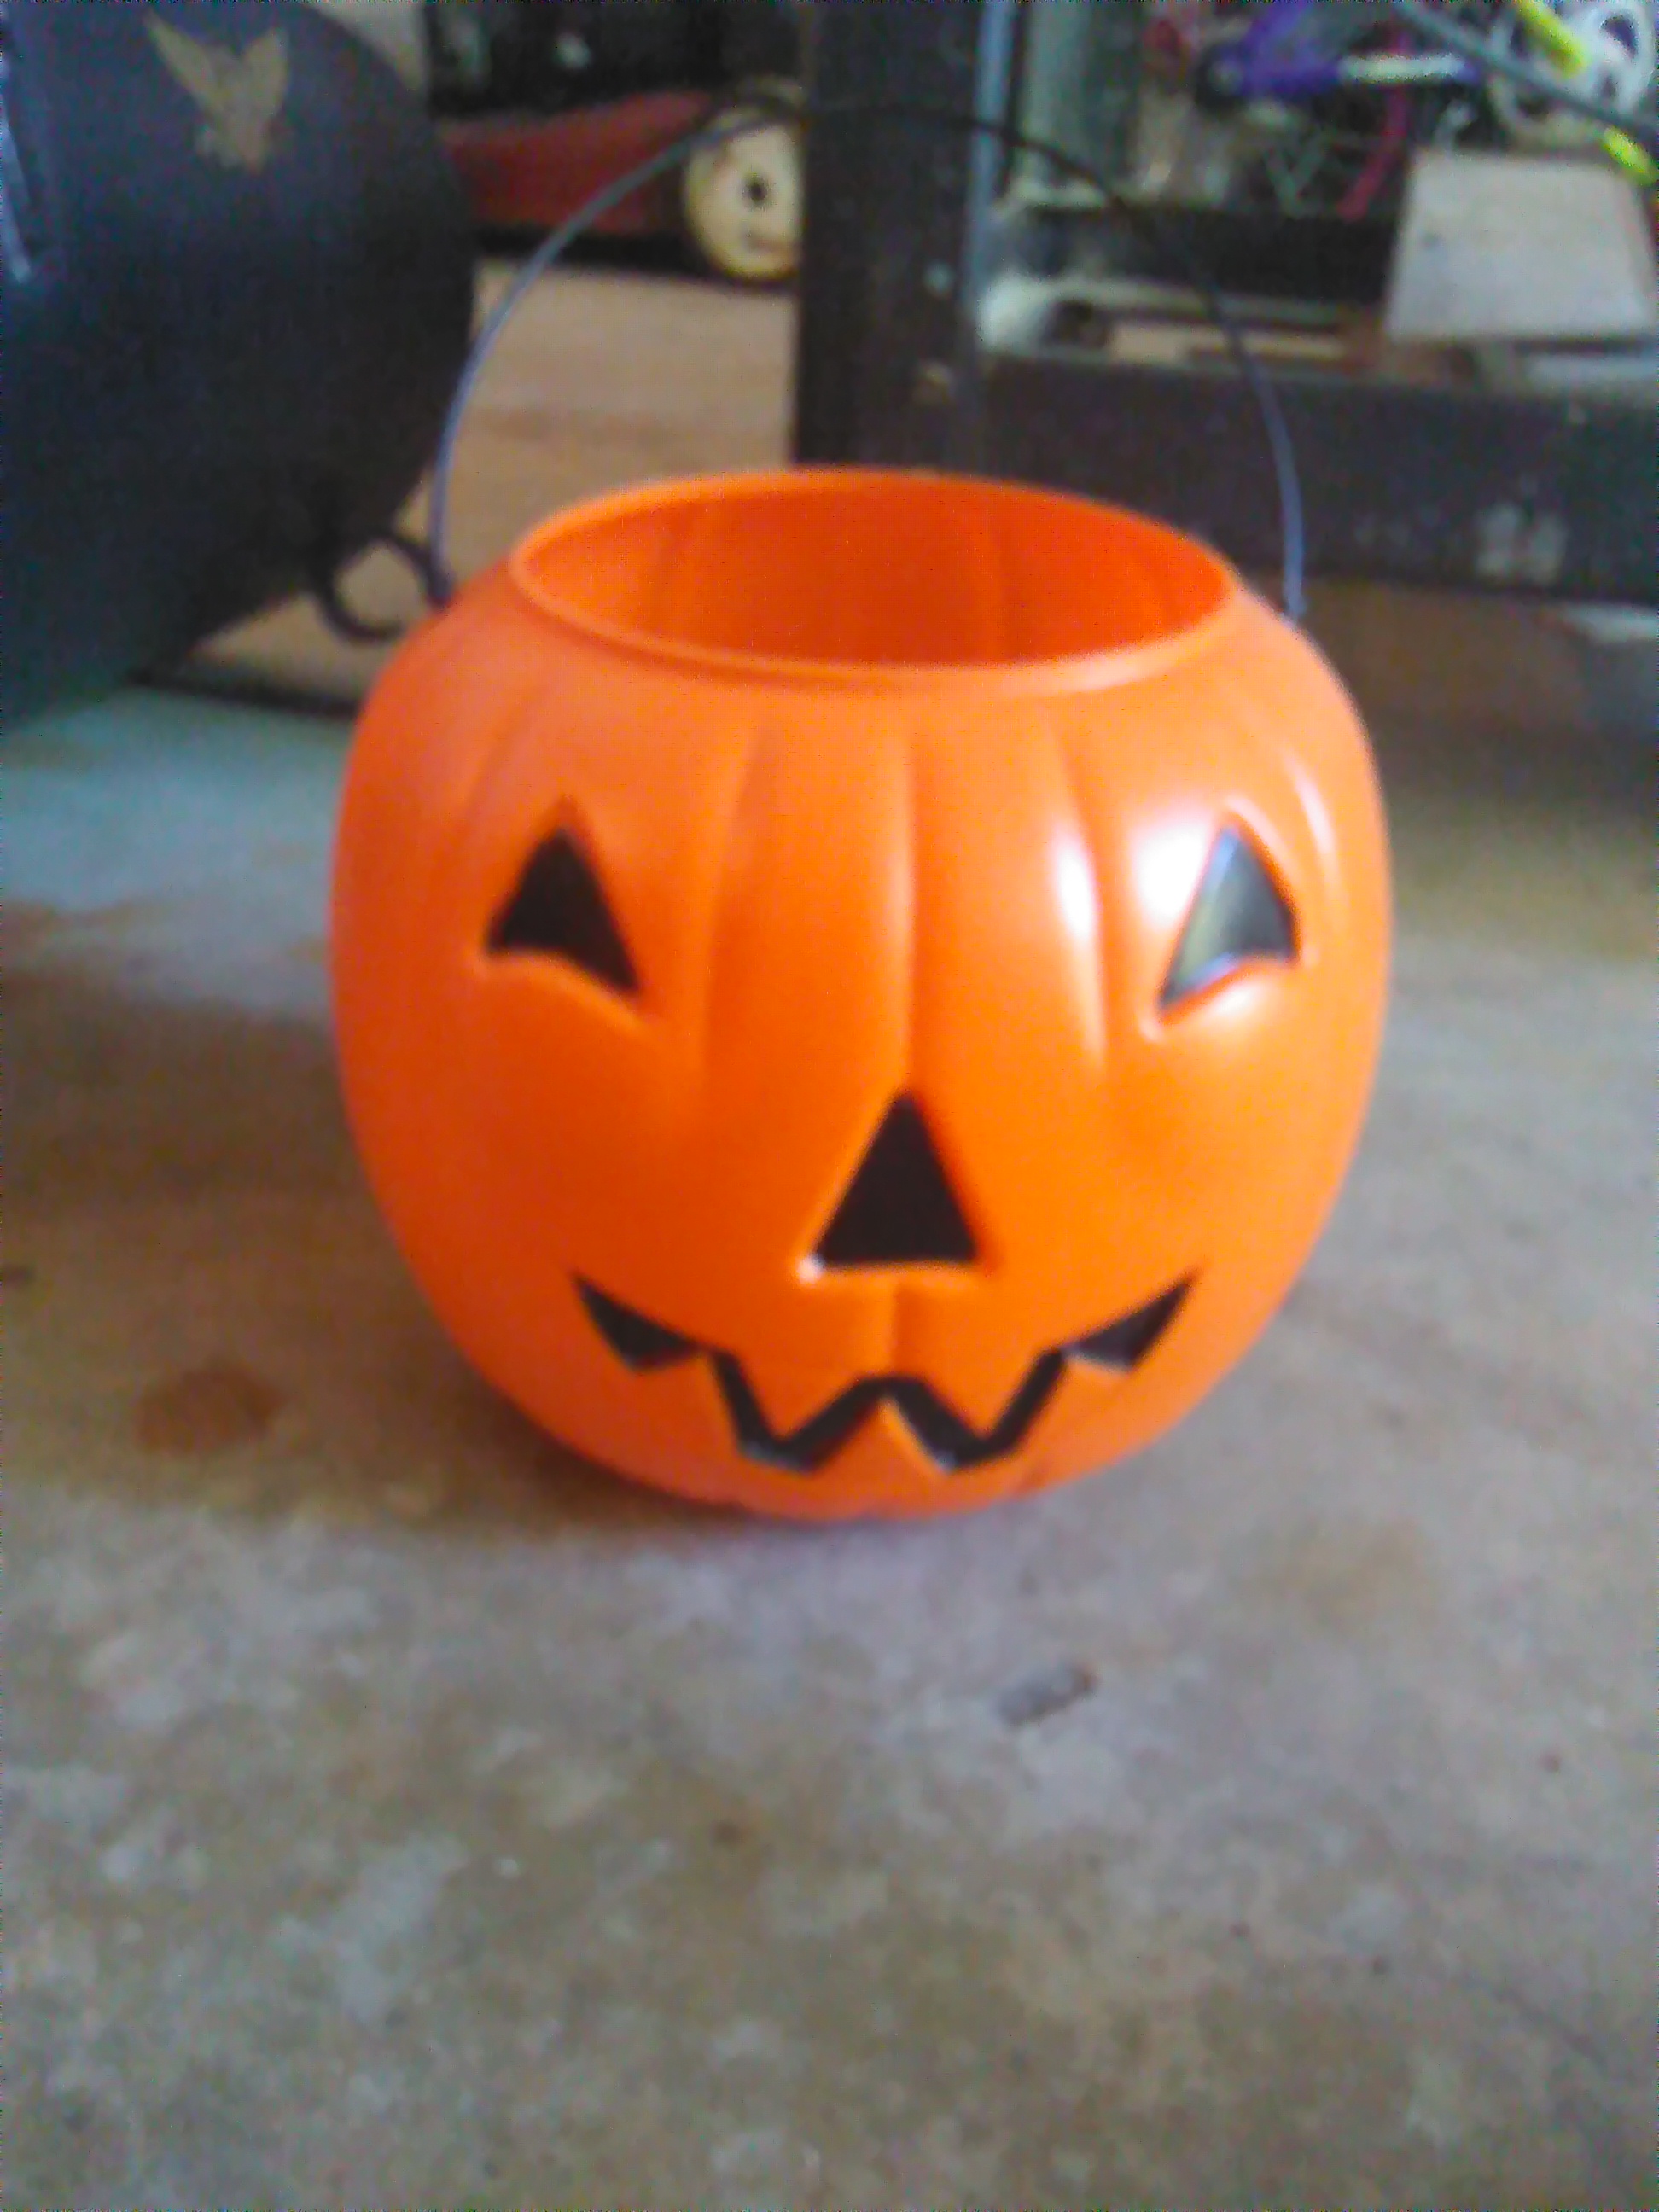
Coat the inside of your pumpkin with cooking spray to help keep it from sticking too tight.
Fill up your pumpkin with the concrete. As you fill it up, tap it on the ground every once in a while to get the air bubbles out of the concrete and so that it fills in good. If you plan to make the hole in the middle, fill up your pumpkin almost up to the top. Spray the outside of your cup with cooking spray and then press it down into the middle. Once you have your cup in place you are going to want to weigh it down so that the cup doesn't pop up while the concrete is drying. I placed a chunk of wood I had left over over the top of it all. You could also fill it with rocks as long as they are heavy enough.
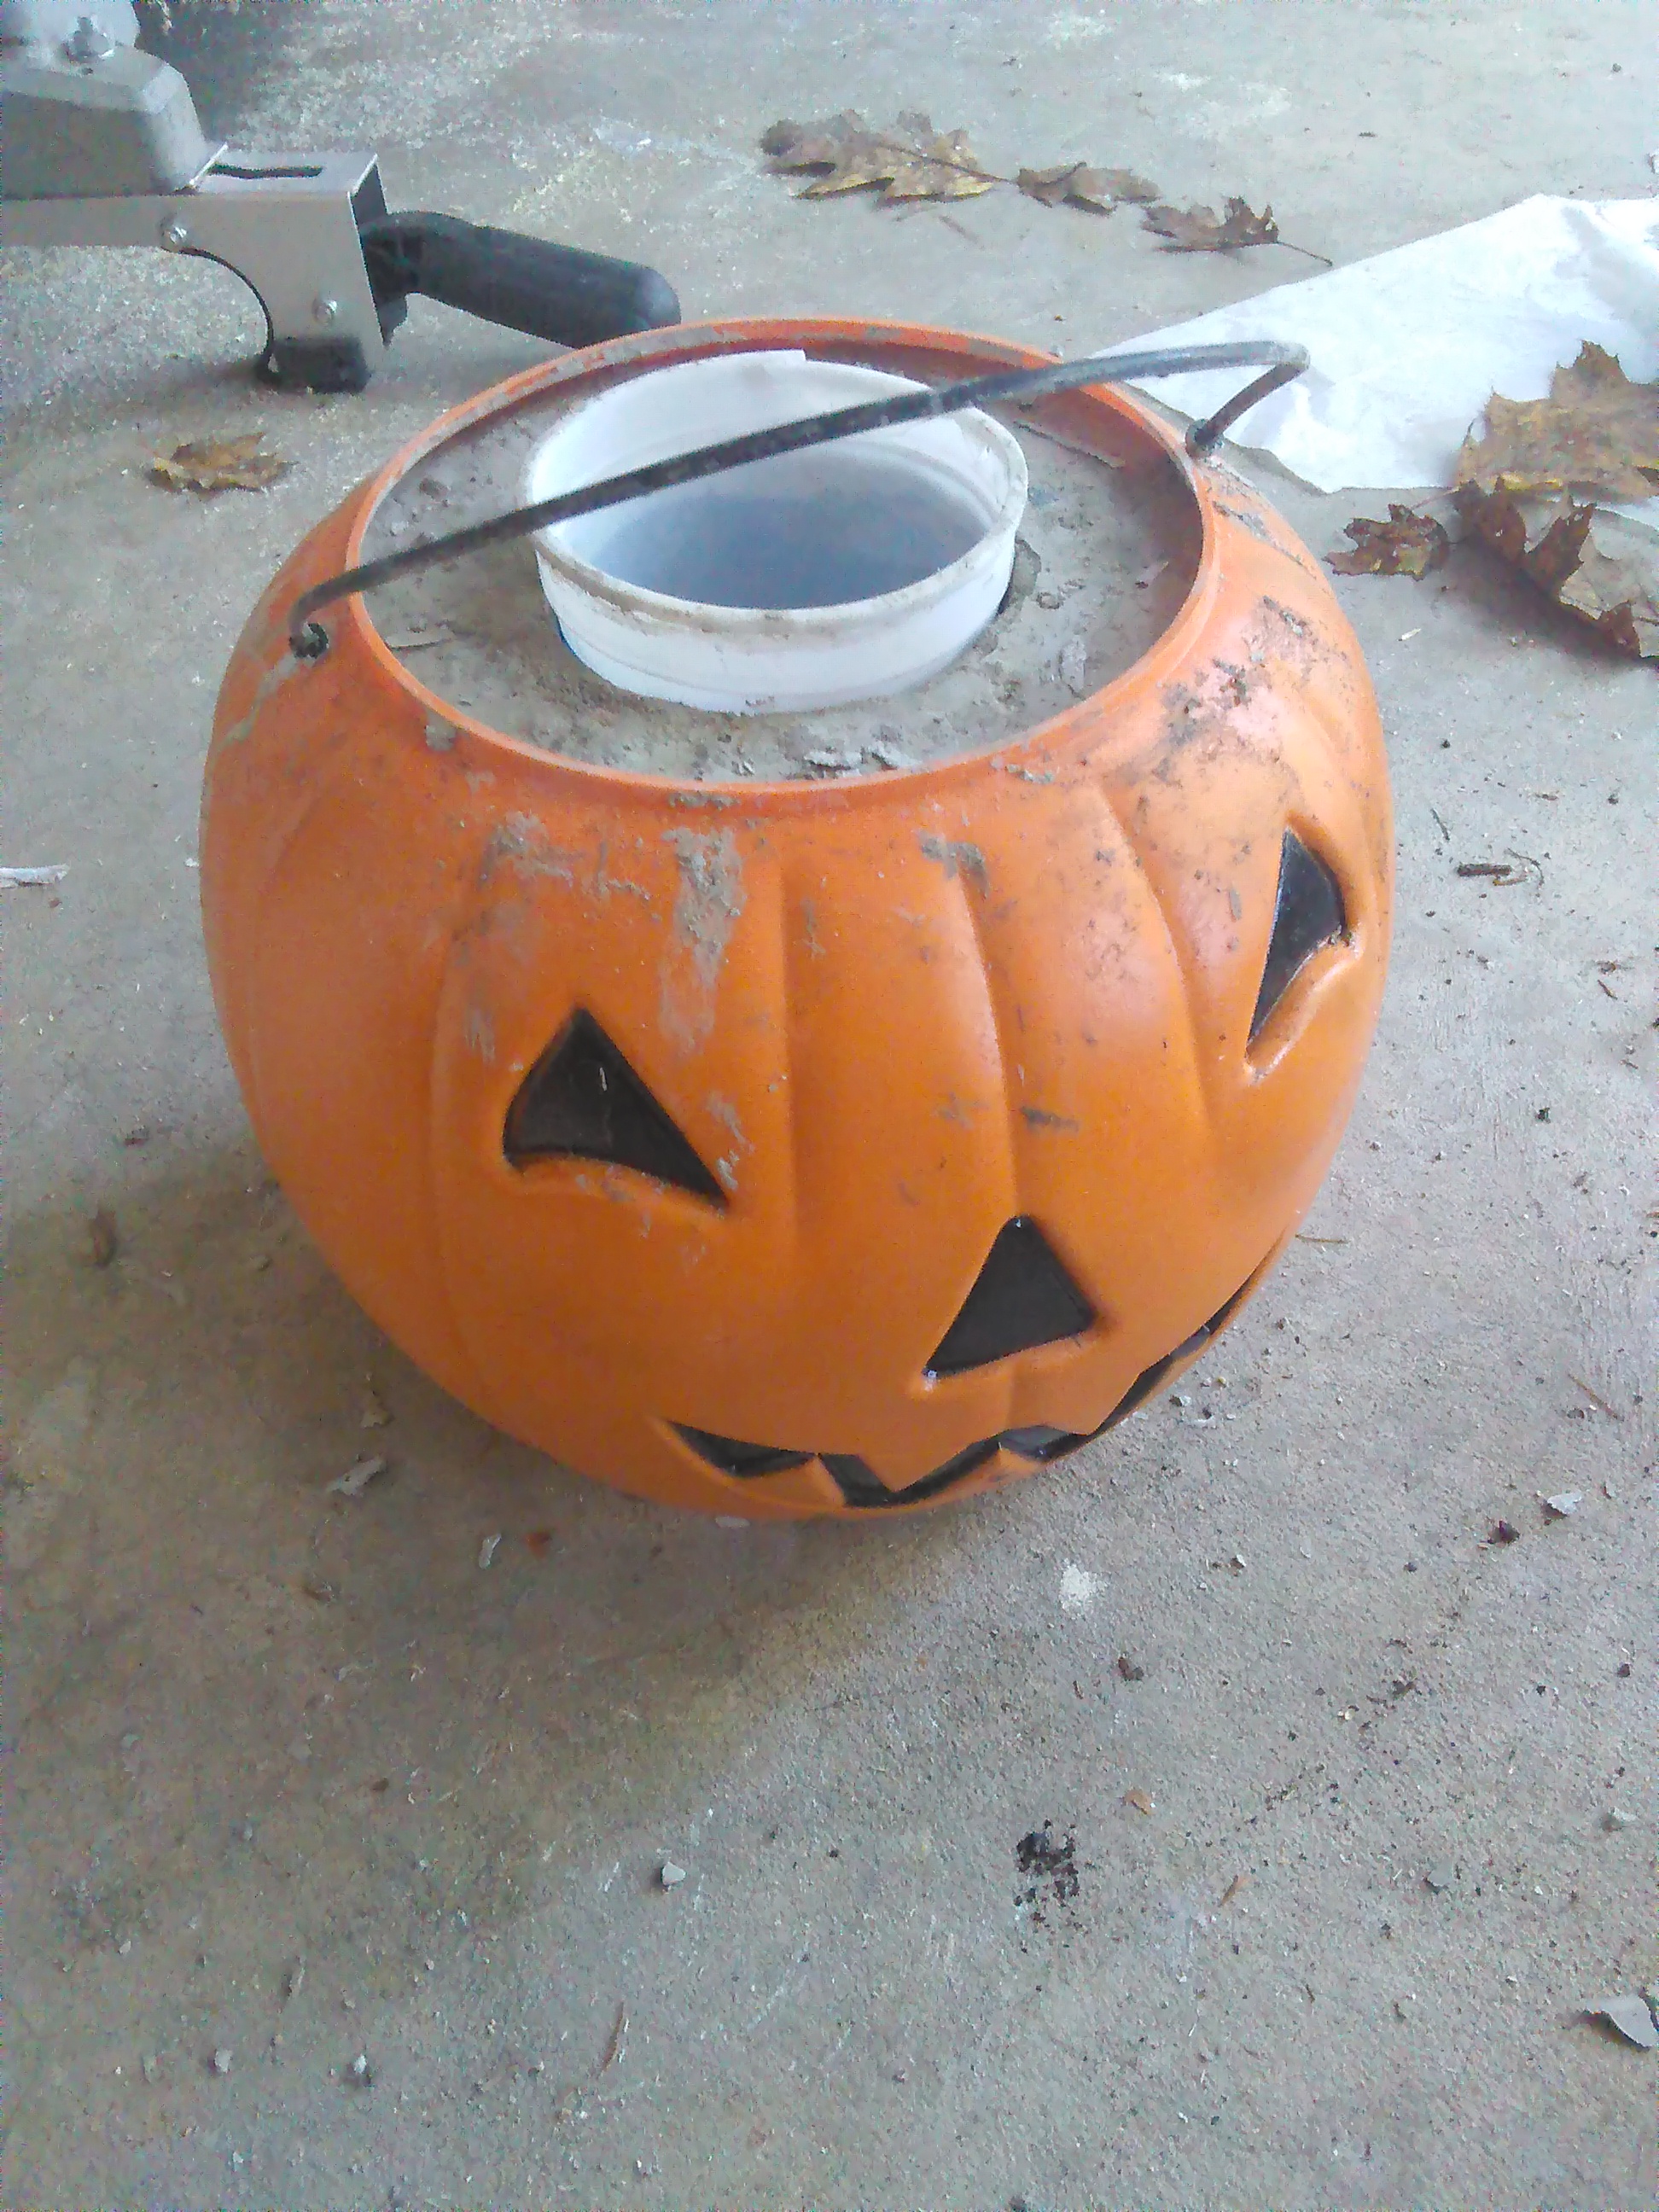
Now you need to patiently wait for it to dry. One thing I would suggest - if you placed a cup in the middle of the pumpkin and have time to watch your pumpkin dry, give the cup a turn every few hours or so. And once your concrete looks to be drying along the edges, pull your cup out and then let the concrete finish drying. I compltely forgot about the cups and had a heck of a time pulling them out once the pumpkin was dry.
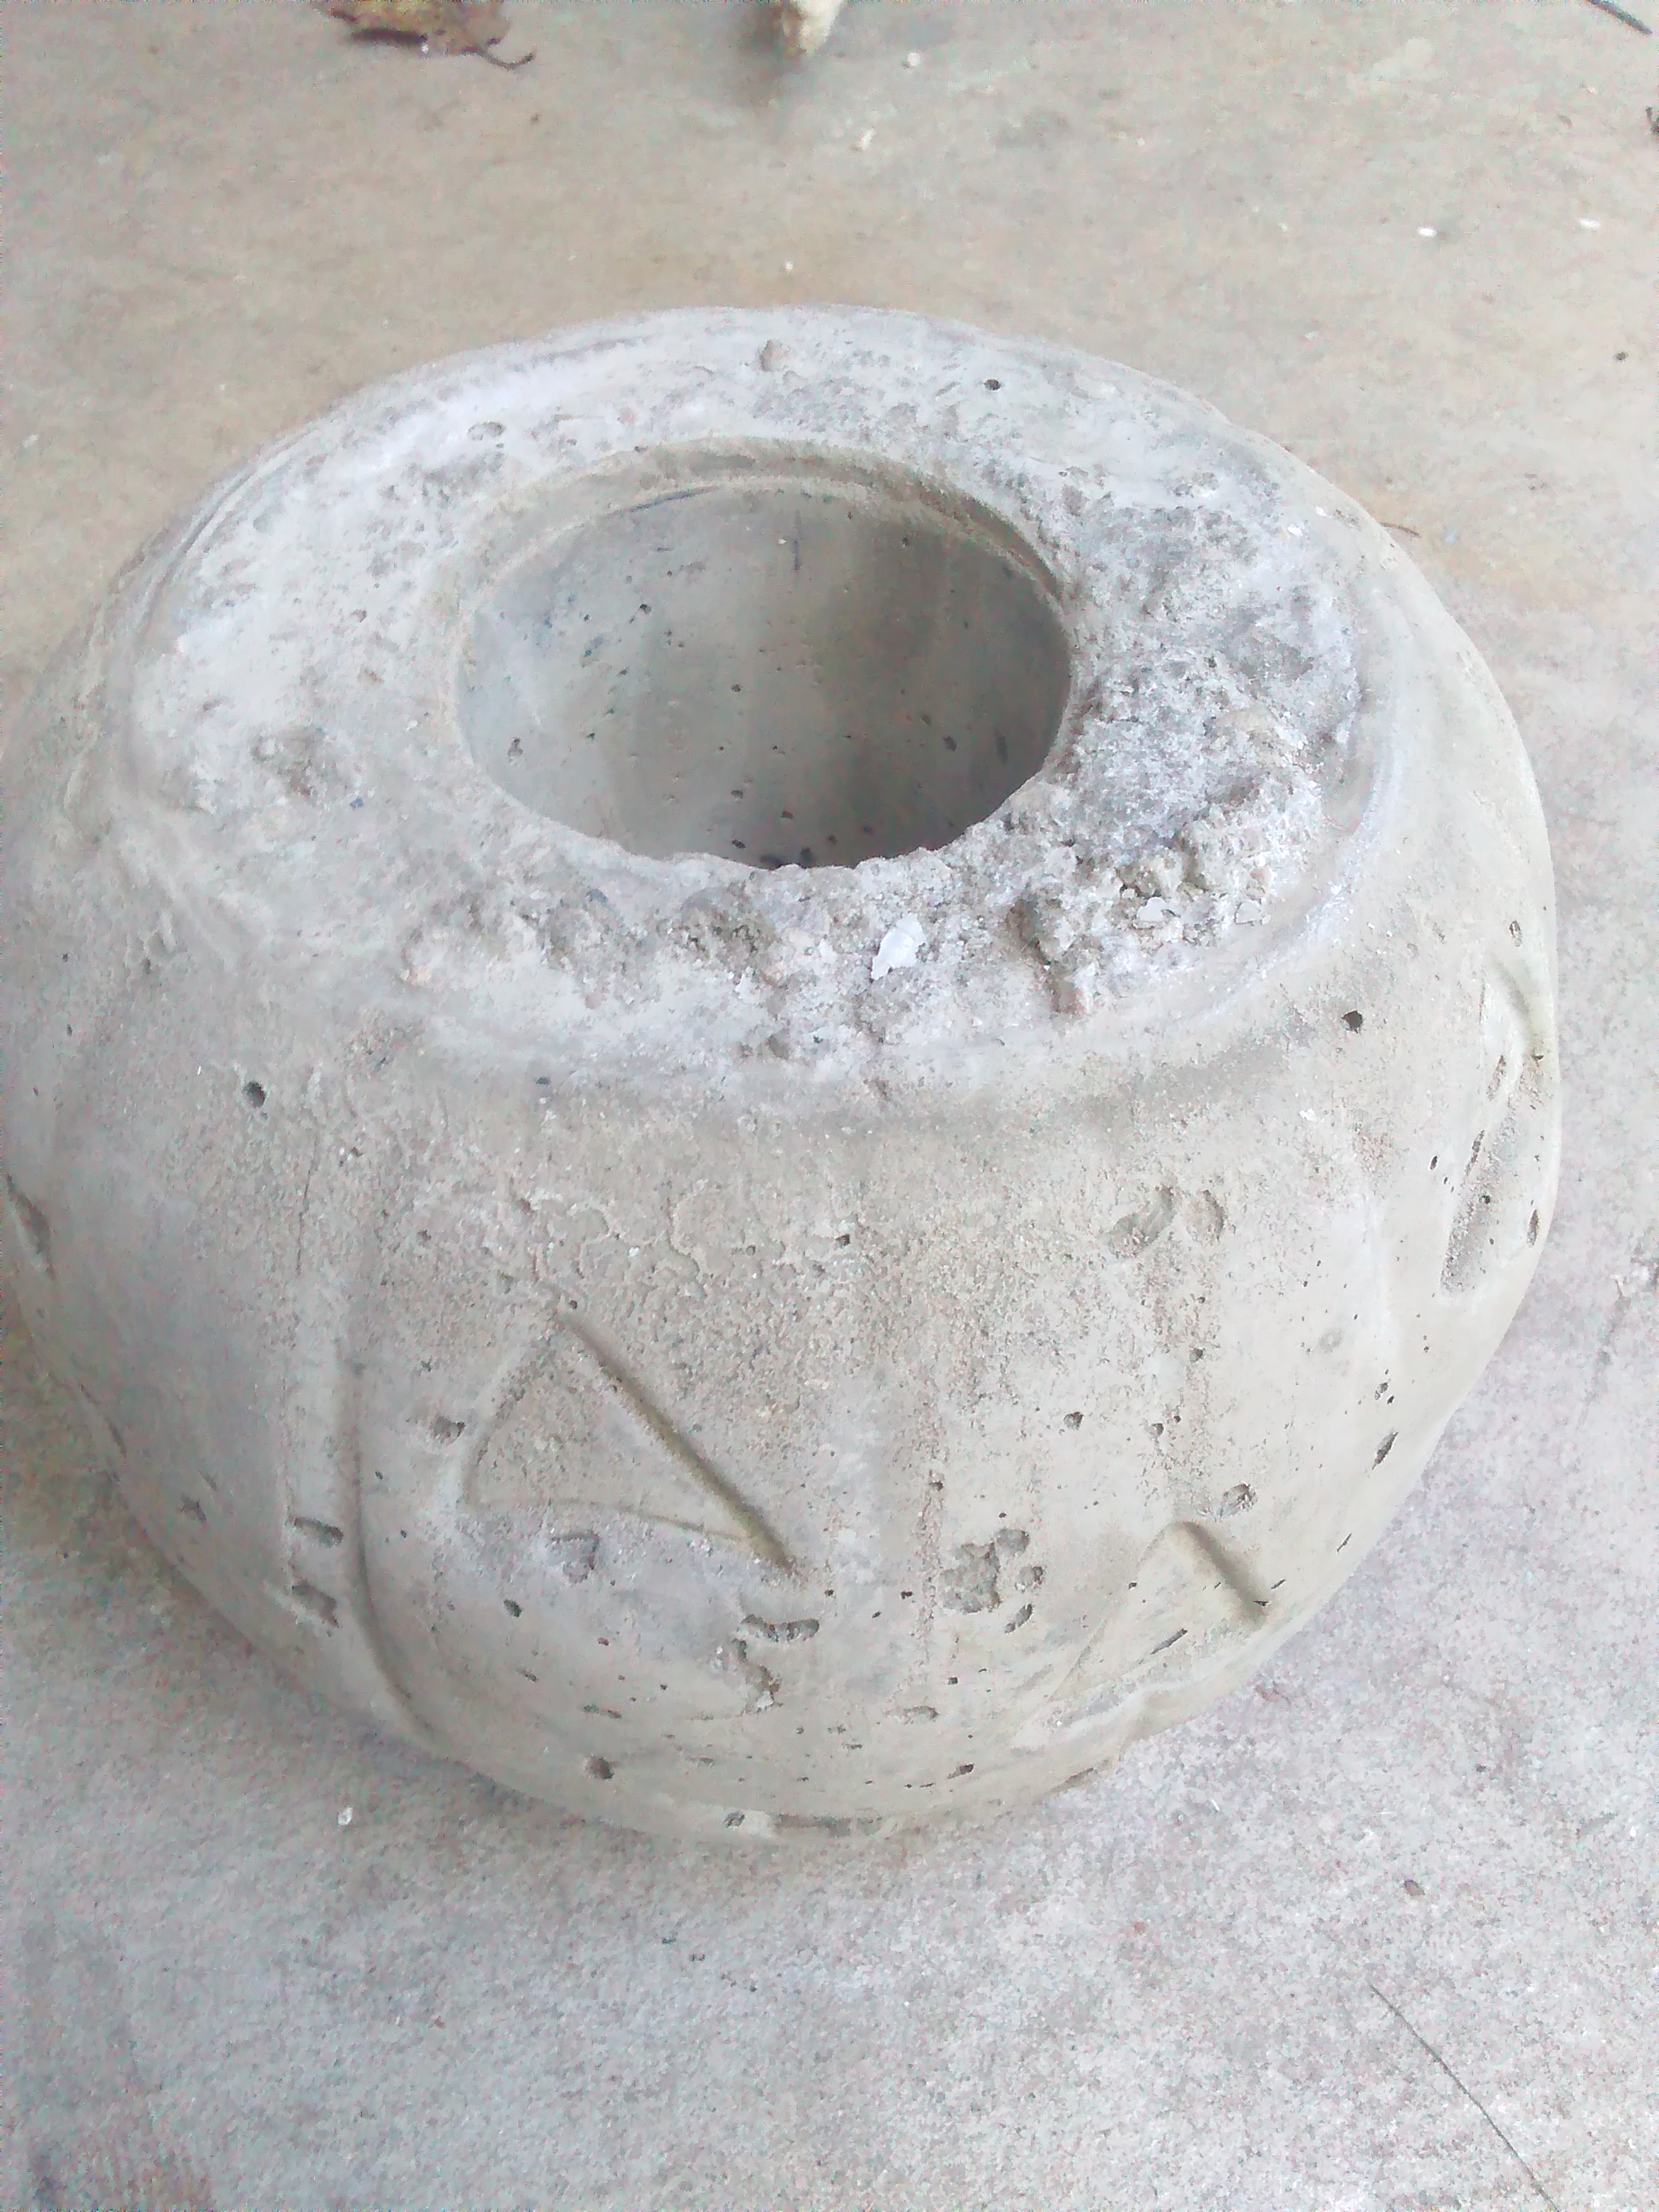
We waited 24 hours for the pumpkin to dry and then we cut it out of the pumpkin pail. It was fairly dry, but not all the way through. I just used a utility knife and started making slits in the pumpkin pail from top to bottom until I got the thing loose.
Once it's out, let it dry another 24 hours so that it is good and hard throughout. Then, give him a candle, some flowers or leave him the way he is and set him out on your porch.
If you want, you can also paint your pumpkin. You can use any color of acrylic paint and then coat it with an acrylic sealer to protect the paint. My daughter wanted to paint our pumpkin, so she painted him her favorite color and we put a candle inside him.
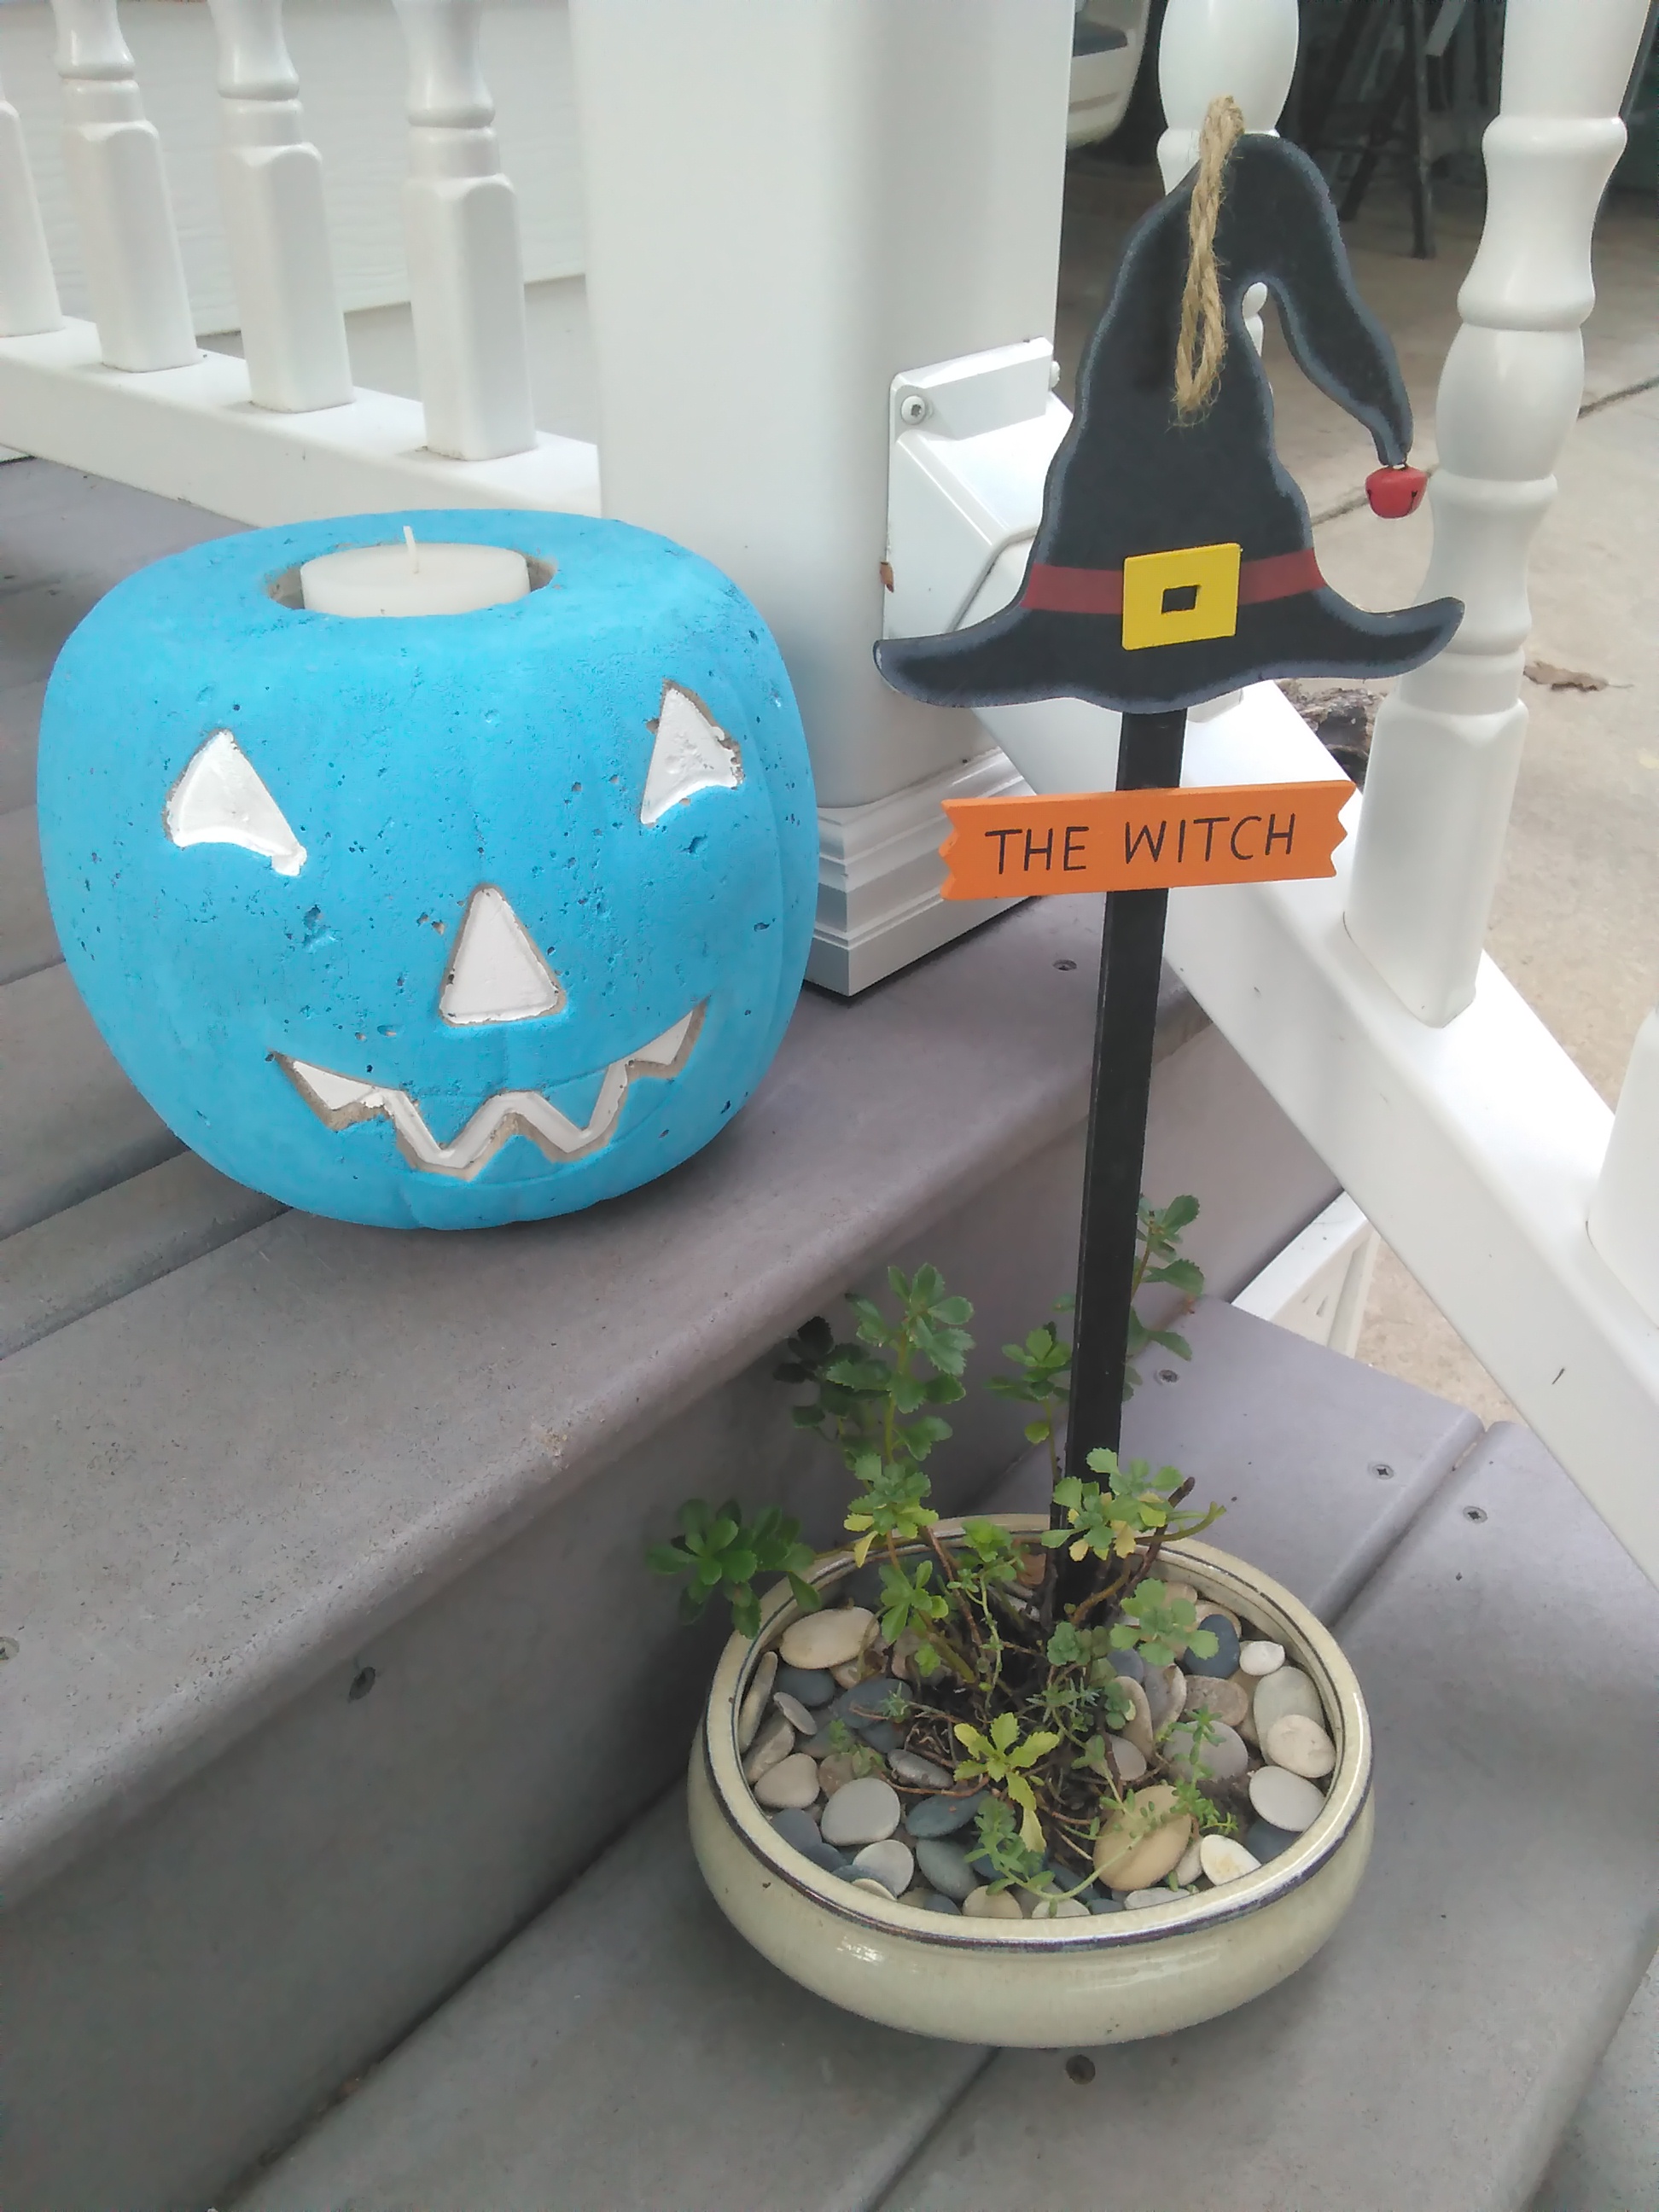
Now he's ready to greet all your visitors!
do it yourself
Want more DIY's?CrazyDIYmom.com Contact Us Privacy Policy Disclaimer About me