
DIY home projects
DIY and easy breakfast counter for your kitchen
* This post may contain affiliate links.
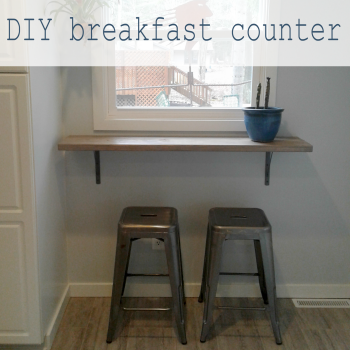
With all the remodeling we've done in this house, this little spot is BY FAR my favorite!
When we were doing the layout of the room we wanted to add a window to this side of the house, but with all the cabinets we wanted this was the only spot to put it - after the last cabinet. Of course it just looked "odd" so I had to come up with something. We live in an area with a lot of wildlife so this window was the perfect place to sit - so we made a little breakfast counter where we could relax, watch the wildlife and enjoy our morning coffee all at once. It's perfect!
What you'll need:
wood (I used a 1"x8"x10' pine board)
2 brackets (you need these heavy duty ones
Classic Gray wood stain
a wood sealer
3" screws and 3/4" screws
MISC: screwdriver, studfinder, level and a pencil

Take your board and cut it to length. My window was 32", my trim was 2" wide and I wanted the board to go past the window 5" on each side so I ended up cutting my board to about 46" long. Once I had the board cut to size I sanded it down really well. I sanded the edges as well to give it a more rounded edge instead of the square.
Once I had the boarded completely sanded I stained it. I used this gray wood stain
Once the last coat had completely dried (I waited about 12 hours ) then I applied this wood sealer
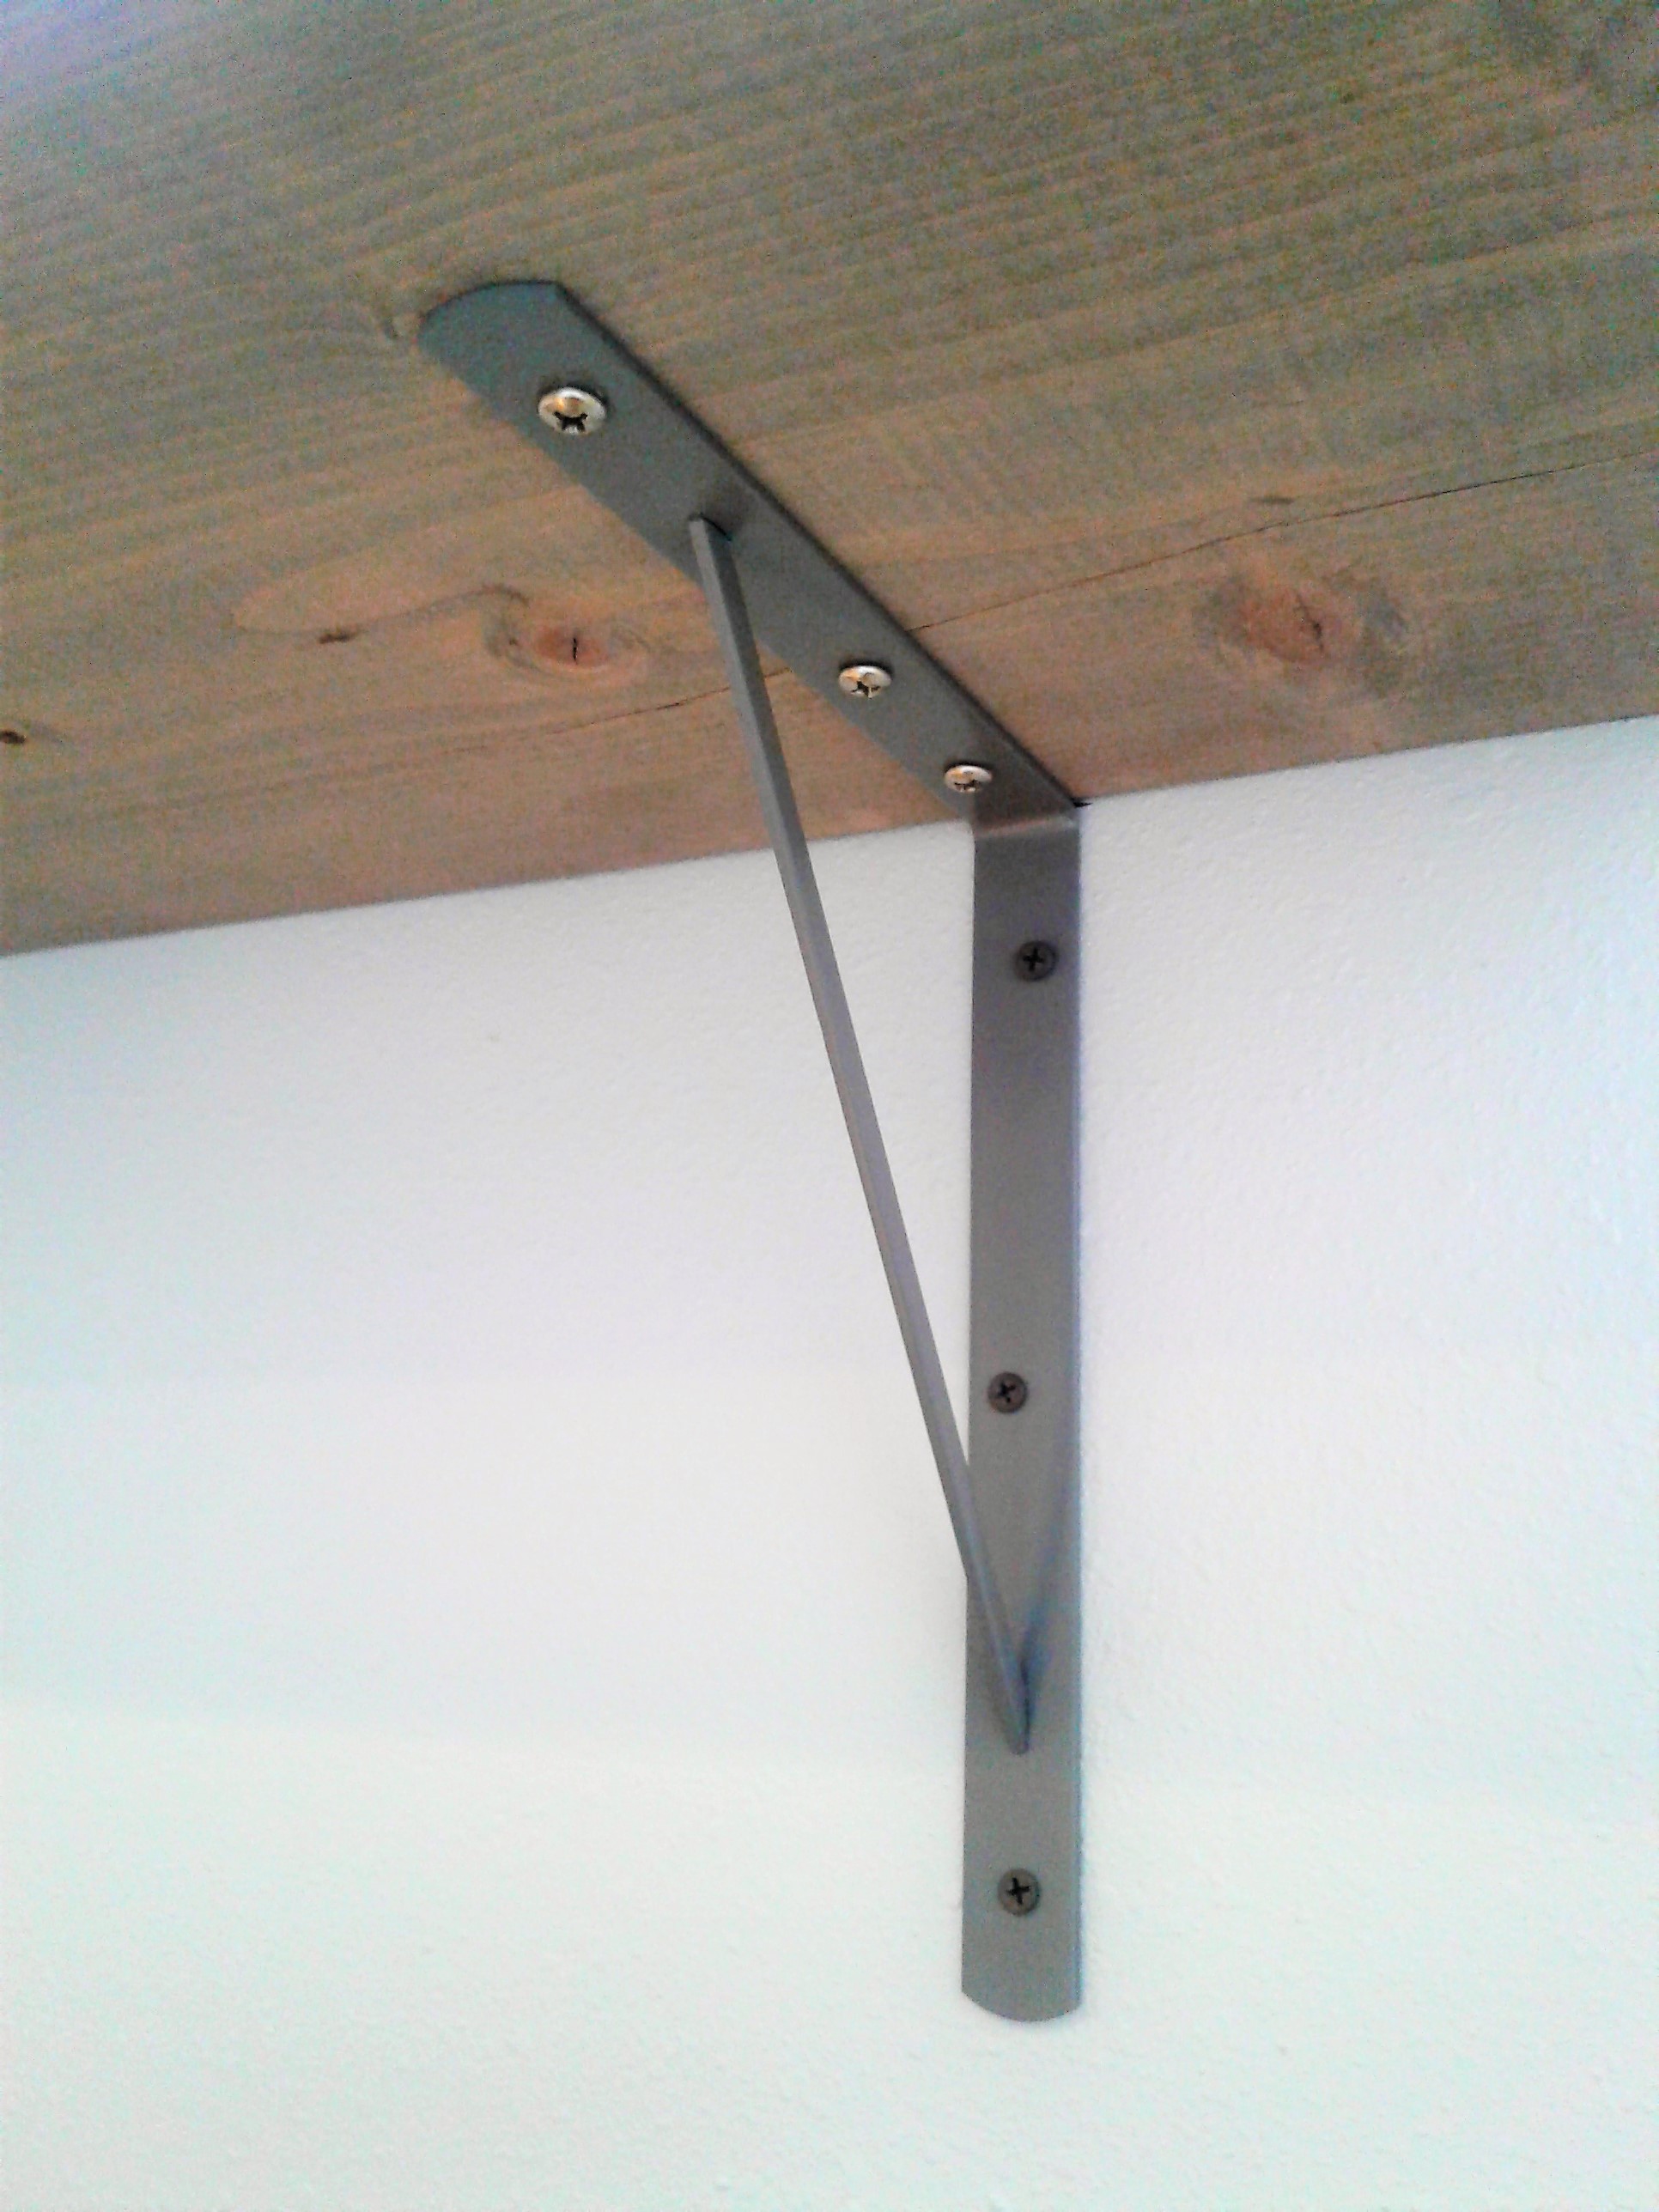
Now you need to locate and mark the studs in your wall so you can attach your brackets. I chose gray brackets because they blended in perfectly. Make sure for a project like this you use the sturdier brackets, usually located in the lumber department of your hardware store and not the brackets that are by the shelving - they are not strong enough to support the weight.
Now here is where you may need another person for help. Decide where exactly you want your counter to go and make little marks on your wall if you need to. Make sure you have your level handy to make sure your counter is level and straight with your window. I attached my breakfast counter so that the top of the counter was about 1" below my window trim.
Mark out the holes from your bracket onto the wall and then predrill those holes. Once you have your holes predrilled, attach your brackets to the wall with long screws. We used 3" screws to attach ours. When you have your brackets attached, attach your counter top to your bracket. Make sure these screws are shorter so that you don't drill through the top of your counter.
Then add some plants, stools and start up your coffee pot and enjoy your new little kitchen spot.
do it yourself
CrazyDIYmom.com Contact Us Privacy Policy Disclaimer About me